• If you are new to GiantScaleNews.com, please register, introduce yourself, and make yourself at home.

    We're 1st in Giant Scale RC because we've got the best membership on the internet! Take a look around and don't forget to register to get all of the benefits of GSN membership!

    Welcome!

The 'What did you do in your workshop tonight?' thread

Snoopy1

640cc Uber Pimp
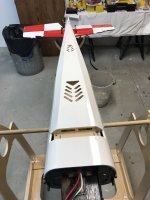
Just took some shots of the finished plane powered up and assembled for flight. The custom wing bolts I made work great and go on / off quickly and easily. Everything working and ready to run. Hope to Maiden soon :)


View attachment 108482 View attachment 108483 View attachment 108484 View attachment 108485 View attachment 108486 View attachment 108487 View attachment 108488 View attachment 108489 View attachment 108490 View attachment 108491 View attachment 108492
Need more details on the wing bolts see the picture but not enough to figure out exactly what you did.
 

49dimes

Damn I'm hungry
Need more details on the wing bolts see the picture but not enough to figure out exactly what you did.

First off.....I had installed 1/4-20 blind nuts over the 5mm nuts in the wings 3 years ago when I first assembled this ARF. The 5mm threads were poor and difficult to start the bolt. I remember when using 1/4-20 hex caps it was difficult getting the four bolts snug with a hex wrench (A bit easier with the new fuse design though). I had some really nice wing bolts in the Alien Extra (Sea-Craft's) and it gave me the idea to make my own.

I just happen to have some "replacement" ZAP ca glue bottle caps I had gotten about a hundred years ago from HTUSA. Never had the chance to use them for I switched to BSI ca four score and seven years ago lol. Any way I cut the tips off the bottle caps and tapped out the center for the 1/4-20 x 1" hex bolt. The center portion of these particular bottle caps is very thick nylon and was perfect for my application. The bolts snug in nice and tight in the nylon bottle caps and don't back off when installing it as a unit in the plane ;).
 

Alky6

150cc
Got a problem....glass'n an ARC from TF. Put on the first coat w/cloth....no problem. Sprayed primer, sanded 95% off....nice smooth surface. Problem arose (wiped down with Acetone) when I put on a second coat this is what I got! Suggestions.....

You have some contamination in the finish. Snoopy alludes to it, wax. If you don't wash the first coat well (soapy water or alcohol as Snoopy suggests) prior to sanding, you can push those contaminants into the epoxy and you will get that bad fish eye. You will have to sand it off, but wash first to get that waxy layer off. Also, you could have had something on your rag that would have put an oil in the base also. I have used acetone with great results, but usually to clean off dust and help soften up the epoxy just before applying the next layer. Never use red rags only clean paper towels. Also, could have been something in the primer you used?

goodluck, but it's a bummer to have to sand it all off. Been there...
 

49dimes

Damn I'm hungry
Just got finished hanging up the plane and putting everything away for now. My new shop table doubles as a engine test bed (on plane of course) and the plane "Hanger / Hauler" fits perfectly inside the lip that goes around the table. Anyway got everything set up outside and it was a fairly quick start of the DL50 ( being dry for some time now) until my typical luck kicked in :cautious:. 7 flips on choke then it popped off. Then 3 flips to a running engine and erratic throttle servo :face-palm:. I decided to try the RCAME ignition that came with my first DJ72. Now I know why they decided to go with their own ignitions :thumbsdown:. It will soon be getting a new RcExcel AO2 ignition. Never have I had a problem with a RcExcel ignition :).
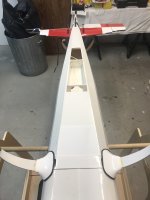
 

tailskid

70cc twin V2
Thanks guys for the help....this epoxy has a "amine Blush" meaning it will appear sticky until you wash it off with hot water and a cotton cloth. Maybe I goofed and just used water, not HOT water. Back to sanding :)
 

Snoopy1

640cc Uber Pimp
@Jetpainter may I ask you to do me a favour. The biplane you are presently working on could you please measure a few things for me.
The cord length, the maximum thickness of the wing and how far back from the leading edge is the maximum thickness. And the wing span.
Thanks
 

Jetpainter

640cc Uber Pimp
@Jetpainter may I ask you to do me a favour. The biplane you are presently working on could you please measure a few things for me.
The cord length, the maximum thickness of the wing and how far back from the leading edge is the maximum thickness. And the wing span.
Thanks
If I remember I'll do it tonight.
 

Jetpainter

640cc Uber Pimp
Got a problem....glass'n an ARC from TF. Put on the first coat w/cloth....no problem. Sprayed primer, sanded 95% off....nice smooth surface. Problem arose (wiped down with Acetone) when I put on a second coat this is what I got! Suggestions.....
Reading your post I'm not exactly sure of your process. The way I understand it, if I'm reading correctly, you layed down your cloth then put on a coat of epoxy, then primed it, then sanded, then another coat of epoxy? I've never seen epoxy put over a primed surface.

I'm guessing there is a compatibility issue when doing it like that. The common way would be to put on your first coat of epoxy as thin as you can get it, using a card or squeegee of some type to get it as thin as possible. Let that cure, then sand it getting it as smooth as you can without sanding through. Wipe the surface down then put on your second coat of epoxy the same way you did the first. The second coat will hardly take any epoxy, and the weight gain from the second coat is very, very small, but it does a great job of filling weave and pinholes. The sand that, and prime.
 

JasonMcD

30cc
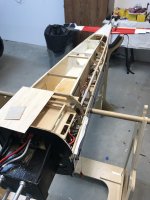
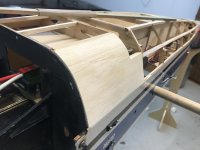
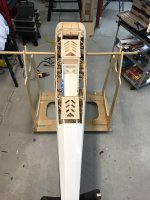
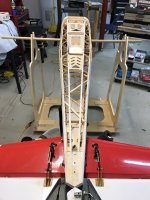
It’s always bothered me that my 88” EF Extra 300 had a big exhaust opening for cans from it’s previous life as a gasser. I bought it used and set it up for electric. The bottom of the plane was a little rough and it had slight balsa damage from the gear bending up at the ends of the flat part.

Did a little repairing and updated the vents. New CF gear is on the way.
 

Attachments

  • 44B92494-BA25-4537-A8F7-02EACB1A2F8C.jpeg
    44B92494-BA25-4537-A8F7-02EACB1A2F8C.jpeg
    1 MB · Views: 288
  • C852B01B-16B3-402F-AF43-3ABC675764A2.jpeg
    C852B01B-16B3-402F-AF43-3ABC675764A2.jpeg
    1.2 MB · Views: 267
  • CDF4F06B-4DD5-49EA-A7C1-FE3D36E8929C.jpeg
    CDF4F06B-4DD5-49EA-A7C1-FE3D36E8929C.jpeg
    2.2 MB · Views: 287
  • 248EA593-760C-41B1-9C51-4F36B0C745FB.jpeg
    248EA593-760C-41B1-9C51-4F36B0C745FB.jpeg
    1.3 MB · Views: 274
  • 7AF243E4-9DC6-46CD-B4B4-619CCA779645.jpeg
    7AF243E4-9DC6-46CD-B4B4-619CCA779645.jpeg
    1.3 MB · Views: 291
  • 3C537D52-5FCF-44B8-ABD4-0745D95255EC.jpeg
    3C537D52-5FCF-44B8-ABD4-0745D95255EC.jpeg
    1.1 MB · Views: 259
Top