• If you are new to GiantScaleNews.com, please register, introduce yourself, and make yourself at home.

    We're 1st in Giant Scale RC because we've got the best membership on the internet! Take a look around and don't forget to register to get all of the benefits of GSN membership!

    Welcome!
  • Unless you are a paid advertiser NO more posting advertisement in the individual vendor forums. You may post in the Manufacturer's Announcements section only but only ONCE a month unless your a paid advertiser.

WrongWayRc 50-60cc GBR (GeeBeeRacer) Build thead

P1010475(1).JPGP1010476(1).JPG
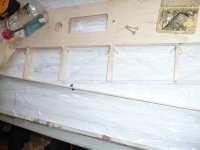
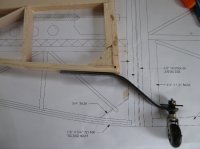
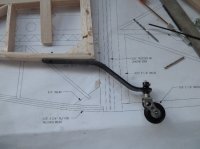
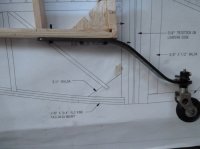
Get them all glued in at the top.
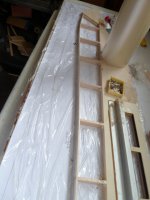
The rudder post gets cut and notched as well. This is then glued to the back of the center section.
 
Last edited by a moderator:
Then glue on the first strip of 1/8 x 3/4 inch to shape.
 

Attachments

  • P1010477(1).JPG
    P1010477(1).JPG
    218.9 KB · Views: 243
  • P1010478(1).JPG
    P1010478(1).JPG
    149.6 KB · Views: 239
Laid in some cross bracing for the ignition mount. After it is covered I will just need to cut a slot to accommodate my velcro strap that will hold the ignition box to the fuse. One strap around the ignition, sticky back on the back of the box and the side of the fuse... Wont go anywhere, will give also, with the engine vibration.

After the first row of lamination is done I cut the same 1/8x3/4 stick to go between each upright as part of the bottom of the fuse lamination process. After that I laminated one more piece of 1/8x3/4 to the outside of the bottom of the fuse so that the three pieces that are laminated become 3/8 wide. This is necessary on the GBR and SBACH because of the flowing outline of the design. If doing the Suhkoi kit the only laminated piece is the canopy area.
 

Attachments

  • P1010479(1).JPG
    P1010479(1).JPG
    81.8 KB · Views: 261
  • P1010480(1).JPG
    P1010480(1).JPG
    90.8 KB · Views: 211
Last edited by a moderator:
So I ran into a problem with the website here tonight. I guess the camera settings were producing pictures that were 3-4mb each... Suddenly I was out of space to upload pictures. I went back and resized the last 4 pictures but before that happened I deleted a bunch from my account not realizing that it would reflect in the thread...

So the first few pages now have missing pictures... I still have the photos on my computer and as soon as I can, will try to re-size them and re-insert them..

I can foresee a problem that somewhere by the end of this build tread or sooner I will run out of storage space again...

Guess a second build thread may not be possible? Mike/Gary what can I do about it?
 

gyro

GSN Contributor
Richard, I've fixed your account attachment limit issue, I'm really sorry for the trouble and inconvenience. It should work fine now.
 
Thanks Gary. I went back and re-sized all the pictures and will continue to make them of a size that is big enough to see but not megabyte sized... I know it is all storage space and that costs...

So the fuse is 98 percent done, I just need to build out around the tail wheel mount and build an area to hold the fuel tank under the wing... One more thing, I have marked out an area for a pipe mount in case I want to put a WWRC tuned pipe on it.
 
On laminating the outside of the top and bottom of the fuse with 1/8 x 3/4 balsa.... It is needed because the flowing lines are too much for 3/8x3/4 balsa.. (said that) but it is ok to spray them with water and let them sit for 15 minutes if they look like they dont want to bend easy enough for you. The belly is a smooth line but the vertical stab to fuse top is a pretty good bend and can use it if it does not want to go easily enough. On the top of my rudder I cut one of the upright posts to the wrong lamination line and the balsa did not want to follow the line... No problem, I just laminated in an extra piece with the font and back sanded to a thin transition and got the shape of the outline that I needed.

More to come.
 
Last edited by a moderator:
Thanks guys. It is a great time of the year to build.

Finishing up the fuse today. First I block sanded the latticework that I just added to the top and bottom of the fuse center section.

I have decided to go back to wax paper... It is a bit more cumbersome than the clear wrap but the CA glue will cause extra work with the clear wrap.

No biggie... Any high spots are block sanded... if I have any bleed out on the bottom with CA, Gorilla or epoxy I like the wood file used gently... If you dig in, the balsa will disappear but lightly block sanding with it to kill the "Hard Spots" works for me.. then I come along with my 220 grit block sander.

On the top and bottom of the plane where I laminated the pieces I round the edges with the sandpaper which will make covering nicer... later..
 
I left the area of the tail wheel open to finish up with a custom fit.

I have a very lightweigh... but strong 85cc carbon landing gear to go as an add on to the kit.

I mocked it up.. and put in my 1/2 x 3/4 upright just before the end of the mount assembly. In my other 50cc planes I mostly do harrier landings.... all the time..... because I can.... and find no reason not to on this one.... The placement of the upright gives the strength needed.... if you break wood... you are in a full fledged "Crash"


Before gluing in the upright I drilled and tapped the wood for a 4-40 thread and then set the one blind nut. The other two bolts will mount deep into wood... again, using the 4-40 tap to thread the wood.

It should be noted at this point that I cut in a piece of 1/8 x 3/4 lite ply that went two uprights forward and the piece of 1/8 inch (hard) ply went one upright forward.... regular balsa would likely not hold up to the pounding so we went with the ply option.... very little weight gain... but needed for strength.

So I drilled my three holes in the carbon leaf and then threaded the 4-40 tap through the 1/8 ply... the 1/8 lite ply... and 1/8 balsa... I made sure I tapped these items and then hardened the holes with thin CA... I also tapped and threaded the back two bolts deep into the two 3/8 triangle pieces so my bolts will pull up tight...

On final assembly I will use CA on all but the one bolt that has the blind nut.

After set, I thin CA the one blind nut to keep it from popping out and then glue in my last upright... plus my angled piece..... Should be uber strong..
 

Attachments

  • P1010483(1).JPG
    P1010483(1).JPG
    199.3 KB · Views: 226
  • P1010484(1).JPG
    P1010484(1).JPG
    208.6 KB · Views: 254
  • P1010485(1).JPG
    P1010485(1).JPG
    193.3 KB · Views: 217
Top