• If you are new to GiantScaleNews.com, please register, introduce yourself, and make yourself at home.

    We're 1st in Giant Scale RC because we've got the best membership on the internet! Take a look around and don't forget to register to get all of the benefits of GSN membership!

    Welcome!

The 'What did you do in your workshop tonight?' thread

stangflyer

I like 'em "BIG"!
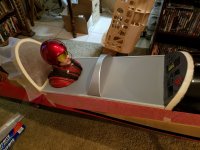
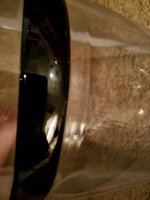
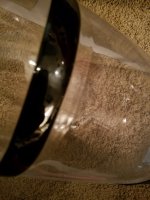
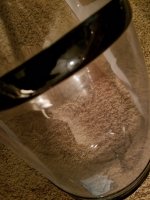
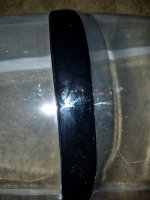
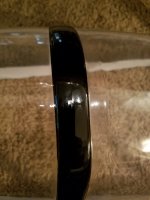
Well I ran into a bit of a snafu this evening with the canopy replacement on the big Yak. After getting everything ready for the replacement canopy to be installed, I fully looked over the canopy and noticed far too many blemishes and imperfections. Also, the overall size of the canopy is bigger than the original. I am wondering if it was designed as such so that it could be trimmed to fit. Which I would probably be okay with if it weren't for so many imperfections. Right on top of the canopy in front of one of the cross braces, it looks as though the plastic has a deformity in it. Kind of like a bulge. Also, the paint lines are not perfectly straight and there are like tiny "dots" under the black paint on the top cross brace. If it were just one small imperfection, I would probably go with it, however there are just too many for me to be satisfied with. I have emailed Tony at Pilot RC with the photos and information. Hopefully they will get back to me soon. For the time being, I am not going to complete the canopy install at this time. I am hoping Tony and his team will get me the correct fitting canopy with no imperfections sent out soon. I did however get the rear canopy support glued in. Now it will be a waiting game.

20180111_185156.jpg 20180111_185203.jpg 20180111_185250.jpg

Here are just a couple of photos of the imperfections.

20180111_220043.jpg 20180111_220055.jpg 20180111_220125.jpg 20180111_220337.jpg 20180111_220345.jpg

I will keep you all posted on the outcome of this minor setback.
 

Snoopy1

640cc Uber Pimp
Well yesterday my switch showed up for the Edge 540. I went ahead and got it installed today. I went with the Booma RC hidden switch. I decided to go with dual batteries as I was going to use a single 2100mah but found two 1100mah that together saved a tiny amount of weight. I really like the way this switch installs and the safety features it provides.
Yes like the booma switch have several and have never had a problem. They make a good product.
 

Snoopy1

640cc Uber Pimp
Well I ran into a bit of a snafu this evening with the canopy replacement on the big Yak. After getting everything ready for the replacement canopy to be installed, I fully looked over the canopy and noticed far too many blemishes and imperfections. Also, the overall size of the canopy is bigger than the original. I am wondering if it was designed as such so that it could be trimmed to fit. Which I would probably be okay with if it weren't for so many imperfections. Right on top of the canopy in front of one of the cross braces, it looks as though the plastic has a deformity in it. Kind of like a bulge. Also, the paint lines are not perfectly straight and there are like tiny "dots" under the black paint on the top cross brace. If it were just one small imperfection, I would probably go with it, however there are just too many for me to be satisfied with. I have emailed Tony at Pilot RC with the photos and information. Hopefully they will get back to me soon. For the time being, I am not going to complete the canopy install at this time. I am hoping Tony and his team will get me the correct fitting canopy with no imperfections sent out soon. I did however get the rear canopy support glued in. Now it will be a waiting game.

View attachment 101370 View attachment 101371 View attachment 101372

Here are just a couple of photos of the imperfections.

View attachment 101373 View attachment 101374 View attachment 101375 View attachment 101376 View attachment 101377

I will keep you all posted on the outcome of this minor setback.
Stared :trance: at this tonight trying to figure how to mount it for a test run for my buddy. He's in to warbirds now.....:).

View attachment 101369
See the muffler and it looks complicated, and cannot even figur how it works.
 

Snoopy1

640cc Uber Pimp
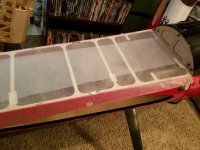
Wow, this is turning into more of a task than I first imagined. I am making progress though. Here are some photos and a simple explanation to each photo as I have been proceeding. First, the tools! A couple of dental picks, a fresh #11 blade in the xacto knife, trim tool and my sealing iron. I used my sealing iron set at just below medium heat to warm the covering on top of the front lip of the canopy. Just enough to warm the adhesive so that I could gently and ever so carefully lift the covering from the canopy lip. Then, using the trim tool, (also set to low heat) I seated the covering on the hatch around the parameter of the lip of the canopy. Gently pull it back to get it out of the way and wahlaa....

View attachment 101341 View attachment 101342 View attachment 101343 View attachment 101344 View attachment 101345

Once the forward edge of the covering was lifted from the lip of the canopy, I used my sealing iron to warm the exterior edges of the canopy where it is glued to the hatch frame. Inserting and sliding my xacto along the frame of the hatch made it really easy to lift the original canopy from the hatch.


View attachment 101346 View attachment 101347 View attachment 101348

I am now ready to remove the broken rear canopy support and clean that mating surface up. Then on to building the new support.

View attachment 101349 View attachment 101350

As mentioned earlier, I wanted to cut some clear plastic to fit over the instrument cluster. In hopes of giving the gauges a more defined look with more depth. I really don't think it makes much of a difference. What do you guys think? You can see the forward panel, (the one with 3w on it) is bare with no clear lens. The rear panel has the clear lens temporarily setting against it. Not too much of a difference. Can any of you see much of a difference?

View attachment 101351 View attachment 101352 View attachment 101353

Ok, now I have the rear support removed from the hatch frame. Time to build the new support.

View attachment 101354 View attachment 101355

Before going further, I wanted to iron back down the covering that lays on top of the canopy frame. It was showing some heat wrinkles. Figured now is a really good time to get that taken care of.

View attachment 101356 View attachment 101357

Now the parts fit and building. Not too much to this. Trial fit, glue, trim, sand. That is about it. I had to put a 45 degree angle on the bottom of the support to give it the right angle once glued into place.

View attachment 101358 View attachment 101359 View attachment 101360 View attachment 101361

And finished. The rear canopy support is now built, sanded and covered and ready to install.

View attachment 101362 View attachment 101363

Next, I will lay wax paper over the fuse and place the canopy into position, insert the canopy locks to hold it into place then install the support and tack glue it into place. After that, I should be ready to install the canopy and tape it to hold it while the RC 56 glue canopy glue cures. By the way, does anyone know if canopy glue goes bad? I have not used mine for some time...well, since the Jtec Pitts build. (Last winter) I hope it is still useable. More of the Behemoth Yak (2) canopy replace to come.
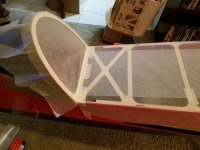
Very hard to tell if the glass cover over the panel looks any different from the photos. If you do it make sure it does not come off from the sun and vibration it would be real pain to fix once the put the canopy back on. Just have to comment on that Pilot boy does he look good.
 
Last edited:

stangflyer

I like 'em "BIG"!
Very hard to tell if the glass cover over the panel looks any different from the photos. If you do it make sure it does not come off from the sun and vibration it would be real pain to fix once the put the canopy back on. Just have to comment on that Pilot boy does he look good.
Thanks Snoop... he definately adds to the look of the plane. Decided against the clear gauge covers. I think they will offer no advantage or added benefits.
 

49dimes

Damn I'm hungry
See the muffler and it looks complicated, and cannot even figur how it works.
That looks like a Byron "Purr'n Power mount that they had for their Corsair.
That is what I was thinking.
View attachment 101379

We have a winner of a chicken dinner :applause:. Sorry Snoop.... "No Soup for you" :sorry: . Rob gets what's behind curtain number 3 :cautious:.HeHe

Close Doug :congrats:. It is actually the Purr'n Power mount/mustang 50 combo. Will be going in a Byron P-47.
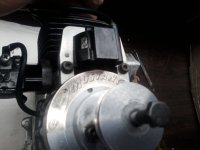
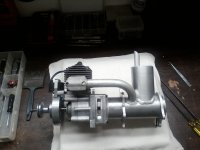

I just got to jig it up for a test run. Needs to be mounted in the plane to determine where to cut (if necessary) the muffler inlet header so the exhaust adapter fitting can be welded in place. For the bench test just going to "shove it" together. It is in really good shape and engine looks to be very low time. The owner just wants to make sure it starts and runs.

0112181607-00.jpg 0112181606-00.jpg 0112181607-01.jpg
 

Jetpainter

640cc Uber Pimp
We have a winner of a chicken dinner :applause:. Sorry Snoop.... "No Soup for you" :sorry: . Rob gets what's behind curtain number 3 :cautious:.HeHe

Close Doug :congrats:. It is actually the Purr'n Power mount/mustang 50 combo. Will be going in a Byron P-47.
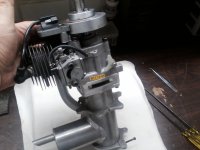

I just got to jig it up for a test run. Needs to be mounted in the plane to determine where to cut (if necessary) the muffler inlet header so the exhaust adapter fitting can be welded in place. For the bench test just going to "shove it" together. It is in really good shape and engine looks to be very low time. The owner just wants to make sure it starts and runs.

View attachment 101380 View attachment 101381 View attachment 101382
It looked familiar because I built a Byron Corsair with one running a Quadra 50 in 1994. Unfortunately I never got to hear it run or see it fly since the guy I built it for was from Mexico. He didn't want me to test run it because he was afraid the gas smell would cause problems in customs.

CorsairSmall.JPG
07-09-2011 10;51;20PM6.JPG
 
Top