• If you are new to GiantScaleNews.com, please register, introduce yourself, and make yourself at home.

    We're 1st in Giant Scale RC because we've got the best membership on the internet! Take a look around and don't forget to register to get all of the benefits of GSN membership!

    Welcome!

IMAC Delro 2.5M Raven Build

Wacobipe

100cc
It only took about 30 minutes with kitchen tongs, broom sticks, long pliers...and a bit of shaking to get all my clamps off and free the canopy! :big-grin:

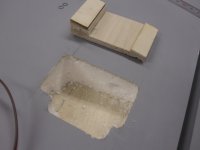
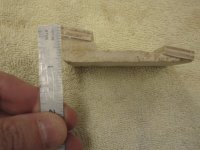
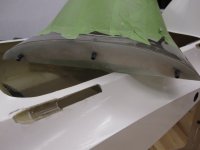
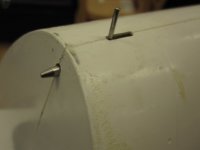
Here's a few photos. First are the pins in the front of the canopy (there is a ply doubler inside both the canopy and the fuselage to reinforce these pins as they are all that will hold the front of the canopy in place). Also there is a photo of the latch. I placed the latch in the fuse with the pin entering the canopy rather than the other way around because the latch mechanism is far less visible that way. Also, I can take the latch handle pin and modify that to look like an antenna or something like that to make it more scale looking!

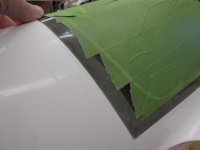
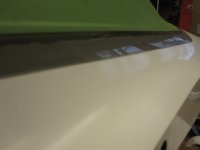
Finally, a few pics of the fit of the canopy...pretty damn nice if I do say so myself...so maybe that clamping mistake was worth it!
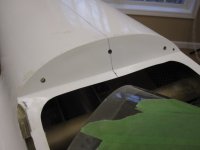
Canopy 2 Fitment (2).JPG Canopy 2 Fitment (3).JPG Canopy 2 Fitment (4).JPG Canopy 2 Fitment (5).JPG Canopy 2 Fitment (1).JPG
 
Last edited:

Jetpainter

640cc Uber Pimp
It only took about 30 minutes with kitchen tongs, broom sticks, long pliers...and a bit of shaking to get all my clamps off and free the canopy! :big-grin:

Here's a few photos. First are the pins in the front of the canopy (there is a ply double inside both the canopy and the fuselage to reinforce these pins as they are all that will hold the front of the canopy in place). Also there is a photo of the latch. I placed the latch in the fuse with the pine entering the canopy rather than the other way around because the latch mechanism is far less visible that way. Also, I can take the latch handle pin and modify that to look like an antenna or something like that to make it more scale looking!

Finally, a few pics of the fit of the canopy...pretty damn nice if I do say so myself...so maybe that clamping mistake was worth it!
View attachment 52920 View attachment 52922 View attachment 52919 View attachment 52921 View attachment 52918
What mistake? It was all part of the plan.;)
 

pawnshopmike

Staff member
This is just too stupid not to share for everyone else's amusement!

Even though I had fixed the original canopy and it was usable, I decided I could do better and also eliminate the hinged canopy idea in favor of a pin and latch setup. Delro had already sent me a replacement canopy and frame so I decided to go for it.

I got everything prepped and this time I clamped the canopy frame to the fuselage very tightly and all the way around the perimeter on the inside to make a very accurate fit...which was easy as it was wide open! Then I glued the canopy to the frame and tightly taped the canopy all the way around to make sure I had a good fit, and left the shop to let the Hysol set. All was well until I came down to the shop this morning to see how the results turned out! I was wondering why the canopy was stuck to the fuse (thinking I had gotten glue overflow ) when I remembered there were about 50 clamps...that are now glued inside the fuselage and not easily accessible! That's an Einstein move!:rolleyes:

Thankfully there is a hatch at the front of the plane for the engine...and I think my arm is ALMOST long enough to reach the clamps! This should only take an hour or 2 to extract them this morning! :woohoo!:

View attachment 52909 View attachment 52908

Now that sounds exactly like something I'd do. Good to know I'm not alone!
 

Wacobipe

100cc
It is a great Easter holiday when you can spend it in the shop! Working on the serve mounts for the wings. The standard setup from Delro is a standard servo box that leaves the top of the servo sticking out of the wing....I hate that look so, as my tag line says...I've never met a build project I couldn't make harder than it needs to be!

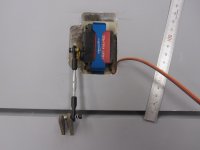
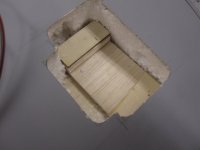
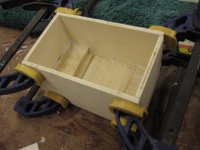
So in keeping with that I decided to build my own boxes to get the servo hidden and placed in an optimal position. This has required me to build a slanted bottom to the servo box so that the servo will sit level just below a planned plywood cover...with only the servo arm sticking out to control the aileron. here are the boxes in progress...corner will get some reinforcement triangles that will also double as screw points for the final servo hatch covers.

Wing Servo Mount (1).JPG Servo Box (2).JPG Wing Servo Mount (2).JPG Wing Servo Mount (3).JPG Servo Box (1).JPG
 

Wacobipe

100cc
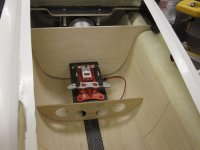
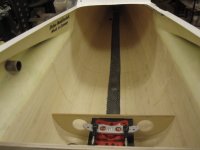
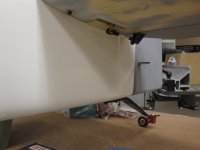
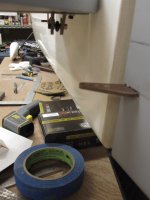
Need some expert technique form y'all... Working on the Raven and got the Rudder servo mounts ready for pull-pull system. My question is how do you determine EXACTLY where the holes need to be in the fuselage for the pull-pull cable to exit the fuse on their way back to the rudder? I cannot figure out a good way to get the proper location without trial and error...and there has to be a better way...Thanks in advance for advice!

Photos below show the situation.

pull-pull (2).JPGpull-pull (3).JPGpull-pull (4).JPG pull-pull (1).JPG
 
I have done this before! LOL!! not easy. it was on a 40% sized 3W extra 330.

you need to get a wide roll of brown paper, like the ones at a meat market, back in the day.

Then cut out about a 6 foot segment, or what ever distance you need for the pull pull and then some.
then, you need to draw out the width of the fuselage and basically, a drawing of the fuselage tail, from the servo tray to the rudder horn.

you need to be as precise as possible, to get the most accurate idea of where you will make the two holes. I also ordered, from Gerhard, these pull pull cable covers, for the fuselage holes for the pull pull. this helps cover up some of the opening.

once you create this drawing of your fuselage tail, then, you will need to use a very long straight edge, and then draw a line from the servo horn to the rudder horn,

you will then get an idea of where it will exit in your fuselage tail. But, you will also need to get an idea of where it will be on the Y-axis!

do you know, will you cross or not cross?

In any event, this will be another decision you have to make.

Let's see if I have pictures. It was about 4 or 5 years ago that I did this.

IMG_2759.JPG
IMG_2760.JPG
 
Well, do not thank me yet! Let me know how it turns out. BTW, in that picture, I did all this, before I painted the fuselage.

this was my 1st 40%er! WOW, what a learning experience. It weighed about 47 pounds!


IMG_3500.JPG
 
Top