Terryscustom
640cc Uber Pimp
I probably will put it over on the glass and paint thread but I'll put a link here for sure!
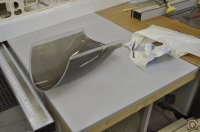
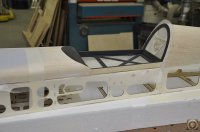
I had it down to I think a hair under 21lb.
This thread is going to make me buy a Viper! Could we consider Terry an enabler!! Good work Terry keep it coming!
")
You need to get that thing done. I know of a certain 580 that will be arriving soon that you are just gonna want to put your pea pickers all over.

All you have to do is call Fibertech and put in your oeder!!!!!!!!I sure agree with the plane envy. I want one now too

All you have to do is call Fibertech and put in your oeder!!!!!!!!
I realy like him too. Plus he is free...I thinkMy marketing director is persistent