You are using an out of date browser. It may not display this or other websites correctly.
You should upgrade or use an alternative browser.
You should upgrade or use an alternative browser.
Aerobeez 90" Extra 330SC (50cc)
- Thread starter gyro
- Start date
gyro
GSN Contributor
Aerobeez 90" Extra 330SC (50cc)
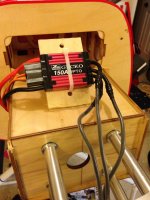
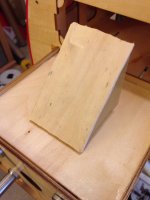
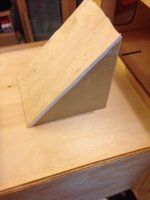
So I didn't want to mount the ESC flush underneath the motorbox because I want it to get some airflow, so I fashioned this plate off some scrap wood from a crashed airplane that I'd saved.
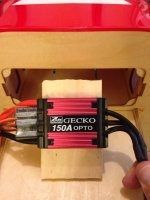
I'll probably mount the ESC on it like this:
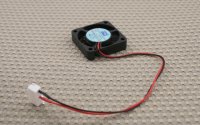
I also picked up a scorpion ESC fan, but I'm not sure how I'd install it yet. Maybe a little 5 min epoxy?
So I didn't want to mount the ESC flush underneath the motorbox because I want it to get some airflow, so I fashioned this plate off some scrap wood from a crashed airplane that I'd saved.


I'll probably mount the ESC on it like this:

I also picked up a scorpion ESC fan, but I'm not sure how I'd install it yet. Maybe a little 5 min epoxy?
3dRCparts.com
70cc twin V2
 Gary You know I sell ESC fans that plug into the 6s balance tap of your lipo, much better airflow than the lower voltage fans that plug into your rx
http://www.3drcparts.com/new-3drcpa...c-cooling-fan-plugs-into-your-6s-balance-tap/
gyro
GSN Contributor
View attachment 21748
Gary You know I sell ESC fans that plug into the 6s balance tap of your lipo, much better airflow than the lower voltage fans that plug into your rx
http://www.3drcparts.com/new-3drcpa...c-cooling-fan-plugs-into-your-6s-balance-tap/
well now I feel like a dweeb! That would have been better!!
That looks like it clips into the 3rd cell, so it's running on 12v?
gyro
GSN Contributor
Quick Question, I just received My motrofly and I'm going to solder the ESC to it also. How do you know which wires go's where? Did you check before you soldered if motor is spinning the right direction? Michael
No, I didn't check, as I didn't need to!
ZTW has a reversing (forward / backward) in its programming menu.
gyro
GSN Contributor
Aerobeez 90" Extra 330SC (50cc)
Got a little more work done yesterday, and finished the pull-pull setup.
Chose to go with the Secraft tensioners and couplers from AztechAeromodels.
Here are some photos of everything getting installed:
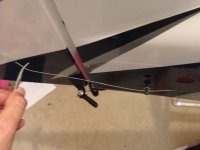
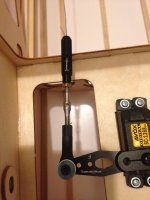
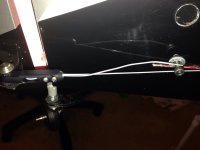
My favorite tool during this adventure was this:

My long reach grabber tool, to get the wires from the tail up to the rudder servo tray.
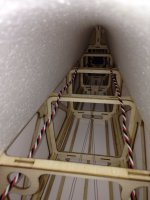
So.... I've gotta vent. It took me way too much time to do this setup. I'd really like to see Aerobeez step up their models with pre-run wires. This fuse had too much criss-crossing wood for me to reach my hand back, so it was tricky to thread the wires from the tail up to the servo.
Also, the wire the give you is just BARELY long enough. (It was not cut in any photos above). While I acknowledge that I could have had the servo output shaft pointing towards the tail, it only would have extended each wire by 3/4 max. In my opinion, I think more than 3 of extra wire is necessary to make it easier to work with when looping and securing thread cables.
Another area for improvement: the servo extension wires have no tube to route down to the tail with, so they needed to go over some of the formers to avoid rubbing on the pull-pull wires. Would really like to see a light fiberglass or small cardboard tube leading to the tail for the wires.
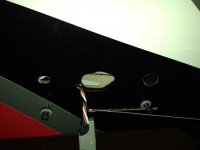
Finally, there is no designated spot for the extensions to exit the fuse. I cut some circular holes in the covering, but fear that over time they will tear, and the area where I had to cut (the only place the can exit the fuse into the stab) is larger in height than the stabs.
Would love to see a square or circular slot for the the wires to exit the fuse on a v2 of this plane.
All done:
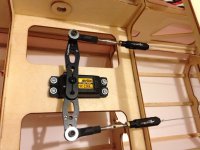
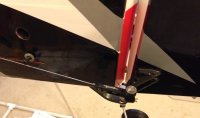
Got a little more work done yesterday, and finished the pull-pull setup.
Chose to go with the Secraft tensioners and couplers from AztechAeromodels.
Here are some photos of everything getting installed:


My favorite tool during this adventure was this:
My long reach grabber tool, to get the wires from the tail up to the rudder servo tray.
So.... I've gotta vent. It took me way too much time to do this setup. I'd really like to see Aerobeez step up their models with pre-run wires. This fuse had too much criss-crossing wood for me to reach my hand back, so it was tricky to thread the wires from the tail up to the servo.
Also, the wire the give you is just BARELY long enough. (It was not cut in any photos above). While I acknowledge that I could have had the servo output shaft pointing towards the tail, it only would have extended each wire by 3/4 max. In my opinion, I think more than 3 of extra wire is necessary to make it easier to work with when looping and securing thread cables.
Another area for improvement: the servo extension wires have no tube to route down to the tail with, so they needed to go over some of the formers to avoid rubbing on the pull-pull wires. Would really like to see a light fiberglass or small cardboard tube leading to the tail for the wires.

Finally, there is no designated spot for the extensions to exit the fuse. I cut some circular holes in the covering, but fear that over time they will tear, and the area where I had to cut (the only place the can exit the fuse into the stab) is larger in height than the stabs.
Would love to see a square or circular slot for the the wires to exit the fuse on a v2 of this plane.

All done:


3dNater
3DRCF Regional Ambassador
I like the grabber tool  gonna have to make me one of those. I have been doing the nose down shake n bake lol. I guess that starts to be impractical on the larger planes. I agree that a tube for servo wires would be nice. A pull string would be an added benefit as well.

