• If you are new to GiantScaleNews.com, please register, introduce yourself, and make yourself at home.

    We're 1st in Giant Scale RC because we've got the best membership on the internet! Take a look around and don't forget to register to get all of the benefits of GSN membership!

    Welcome!

INVERSA 33 ARF assembly by Hanger 9. Motor OS-GT33

Snoopy1

640cc Uber Pimp
Well gentleman this is my first build thread, and all I ask please be patient and need all the help I can get.
How did I end up with this plane well went to the LHS just to have a look around and pick up some small parts and some CA. Met the owner while he was doing some cleanup. While he had the Inversa kit in his hand I looked at it then said will give a good deal well the rest is history. Plane is at home on the bench ready to be built.
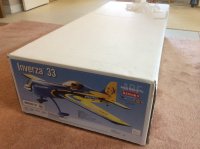
Removed the plane from the box. It was in good shape and had no damage.
The covering was excellent and very nicely applied with very little wrinkles, spent about an hour and everything was good. Must say these AFR builders really know how to apply covering over covering.
Checked the glue joints looked good but spent a little time going over everything that I could reach and put about 1oz CA into the plane.
My first step will be to see how well the OS will fit the plane. It was built for an Evolution 33 with carburetor in the front like an old glow engine. The motorcade box looks really close to the cowl.
Guys please let me know if I am going into to much detail or need more detail on something and if pictures are required need some guidance first time doing a thread.
 

Attachments

  • IMG_1464.JPG
    IMG_1464.JPG
    251 KB · Views: 1,269

stangflyer

I like 'em "BIG"!
Well gentleman this is my first build thread, and all I ask please be patient and need all the help I can get.
How did I end up with this plane well went to the LHS just to have a look around and pick up some small parts and some CA. Met the owner while he was doing some cleanup. While he had the Inversa kit in his hand I looked at it then said will give a good deal well the rest is history. Plane is at home on the bench ready to be built.
Removed the plane from the box. It was in good shape and had no damage.
The covering was excellent and very nicely applied with very little wrinkles, spent about an hour and everything was good. Must say these AFR builders really know how to apply covering over covering.
Checked the glue joints looked good but spent a little time going over everything that I could reach and put about 1oz CA into the plane.
My first step will be to see how well the OS will fit the plane. It was built for an Evolution 33 with carburetor in the front like an old glow engine. The motorcade box looks really close to the cowl.
Guys please let me know if I am going into to much detail or need more detail on something and if pictures are required need some guidance first time doing a thread.
In my opinion, you can never include too much information. For the experienced builder, it is nice to see how others do things. You never know, even though we've done things before someone may have a quicker, easier better way. For the novice, the information will be greatly appreciated and help someone new build like an expert. I don't consider myself the prime example of an expert. (I am too stubborn and bullheaded) However, I'm not above giving something really cool a thought. So build on. Bring on the info.

One caution I will respectfully offer however is: you will soon find you'll step up your procedures from the norm. I think build threads, (stick/box or ARF alike) instinctively cause a builder to become more proficient.
 

WMcNabb

150cc
Cool! Thanks for starting the thread.

Very interested to watch you put this together and hear your thoughts on it, from both an assembly and flight perspective.

Not sure why I never pulled the trigger on one of these. Doesn't get much better than Quique, Kevin and Mirco collaborating on a design.
 

Snoopy1

640cc Uber Pimp
IMG_1471.JPG
IMG_1470.JPG
IMG_1469.JPG
We'll I had a feeling that the OS would not fit and it does not, it more than 3 inches longer than the EVO33. After laying out all the dimensions and seeing how it looks, not good. The carburetor needles high and low are smack bang in the middle of the firewall. Can not adjust them in that location. So I had to cut the motor box back enough to expose the fuel needles, and cut a big enough opening to clear the carburetor.
When you gentleman cut back your motor boxes how do you reconnect them. I was thinking of wrapping the out side of the motor box with 2 oz cloth all the way around and about 3 inches wide. Do you think that will be sufficient.
 

Snoopy1

640cc Uber Pimp
Cool! Thanks for starting the thread.

Very interested to watch you put this together and hear your thoughts on it, from both an assembly and flight perspective.

Not sure why I never pulled the trigger on one of these. Doesn't get much better than Quique, Kevin and Mirco collaborating on a design.

Looking at the wood around the motor box and joints look like they did a good job. The quality of the wood used on the firewall is the best it must be 9 or 10 layers no cavities and 6mm thick so I like what I see so far.
 

Snoopy1

640cc Uber Pimp
IMG_1480.JPG
Sorry about that the first thing I always do is assemble the landing gear and install it on the plane. Do this to get the fuselage off the workbench and keep Hanger rash to a minimum. It was pretty straight forward. The wheel pants were well made and and sturdy. The two problems I had was that if I installed the gear as described in the manual it did not look right and the wheel pants bib not fit properly. Turned the gear around and everything looked good and the pants fitted. So that is how the gear was installed. The other thing I did not like is that the cover plate for the gear holds the gear in. You set the gear in place put the cover plate over the gear and then install the bolts through the wooden cover plate through the gear into the fuselage. Did not like that but installed it as showed in the manual, but will keep an eye on it.
 

Snoopy1

640cc Uber Pimp
Do not have the standard OS muffler for the engine and it looked like it would interfere with the firewall again. So I have decided to do a build your own from parts from KS exhaust systems . And a canister from ProRc. Will see how that all works out once I have received all the parts. Pictures later when it all shows up. Decided to try this because this summer while playing around on the engine test stand a friend showed up this canister. We jerry rigged It to the OS and picked up almost 680 RPM. We will test it again when it all shows up and it is assembled.
 

stangflyer

I like 'em "BIG"!
View attachment 93029 View attachment 93028 View attachment 93027 We'll I had a feeling that the OS would not fit and it does not, it more than 3 inches longer than the EVO33. After laying out all the dimensions and seeing how it looks, not good. The carburetor needles high and low are smack bang in the middle of the firewall. Can not adjust them in that location. So I had to cut the motor box back enough to expose the fuel needles, and cut a big enough opening to clear the carburetor.
When you gentleman cut back your motor boxes how do you reconnect them. I was thinking of wrapping the out side of the motor box with 2 oz cloth all the way around and about 3 inches wide. Do you think that will be sufficient.
Not sure I would've done it that way, but a little too late now. Typically if I have to shorten (move back) the firewall, I will free the motor box sides from the firewall and that way I have plenty to work with. You won't be using the motor box sides, top and bottom where the firewall originally sat so no worries if you bugger it up just a tick removing the firewall. Measure your box sides for correct length, cut, clean up firewall and re-epoxy into new location. Of course you'll match your motor box top and bottom with the sides before making the final assembly.

I think where you're at now, if you epoxy glass the cloth on the outside and doublers on the inside you will be plenty strong enough. Probably won't add but maybe an ounce or two. Which for your setup, it probably won't hurt the cg at all.
 
Top