• If you are new to GiantScaleNews.com, please register, introduce yourself, and make yourself at home.

    We're 1st in Giant Scale RC because we've got the best membership on the internet! Take a look around and don't forget to register to get all of the benefits of GSN membership!

    Welcome!

IMAC Pattern - Cadence w/ DA 35

TonyHallo

150cc
I mix in 6 gram increments, 5 resin, 1 hardener, often 2 grams of hardener are added, still end up throwing a lot away. Never had a problem, of course my stuff isn't going to outer space. A gallon last a long time, the resin crystallized in the cool basement. Set the gallon container in front space two weeks ago.
 

Bartman

Defender of the Noob!
I mix in 6 gram increments, 5 resin, 1 hardener, often 2 grams of hardener are added, still end up throwing a lot away. Never had a problem, of course my stuff isn't going to outer space. A gallon last a long time, the resin crystallized in the cool basement. Set the gallon container in front space two weeks ago.

that's what I do too Tony, about 10g of resin and 2g of hardener is as small as I'll go. it's enough to know it's being mixed well and minimizes waste, can always mix more for larger jobs.
 

Alky6

150cc
Below pic shows how to make a break in the panels. This point is where the straignt section of the fuse sides start the taper. I run it through the table saw about 3/4 of the way through the panel.
3345373E-FFD8-41D2-B6E1-FFED65F629BA.jpeg


Bend the panel back and pack with epoxy mashed potatoes. Then use a squeegee to remove excess epoxy.

7326A808-F406-49FB-B2B1-BA26615BD85D.jpeg


Paint on some non-thickened epoxy and add your cloth. Using 2 oz cloth here. Will be adding a second layer when I add the former in after it dries. Also squeegee’d off excess epoxy from cloth.

3A3D7FEF-0502-4D86-874B-734FF1AF32EA.jpeg


Top view of the fuse break.

4F9CE0BB-F54E-4BD1-9586-61474F9FE1C1.jpeg


Firewall had mashed potatoes placed in edge and placed. Prior to placing, painted on some non-thickened epoxy on the fuse sides to help with bonding.


10EC46E2-0B39-44AD-A52A-B891887C14D0.jpeg


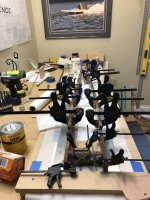
Another view of jigging and layup. Also added a temporary former at the tail.

A16D7552-6F90-4658-976A-DA107B178BB7.jpeg
 

Attachments

  • E0E7A2BF-CFAA-4816-9DFB-4E9A1AF23BA2.jpeg
    E0E7A2BF-CFAA-4816-9DFB-4E9A1AF23BA2.jpeg
    1.6 MB · Views: 540
Last edited:

Alky6

150cc
Well.... I picked a bad day to quit drinking

Woke up this morning with that oh crap moment. Didn’t recall double checking the direction of the firewall installation. Yep, 50-50 chance of getting it right and I failed... :( :msn_slap:

Good thing God makes cutting tools and sanders, because I need ‘em.


Note the incorrectly installed firewall with hole spacing for left thrust installed in a right thrust configuration.:face-palm::cryin:

AF3B0D62-8DA2-436E-96D0-D2727E22C1CA.jpeg
 

pawnshopmike

Staff member
Well.... I picked a bad day to quit drinking

Woke up this morning with that oh crap moment. Didn’t recall double checking the direction of the firewall installation. Yep, 50-50 chance of getting it right and I failed... :( :msn_slap:

Good thing God makes cutting tools and sanders, because I need ‘em.


Note the incorrectly installed firewall with hole spacing for left thrust installed in a right thrust configuration.:face-palm::cryin:

View attachment 109219
Ugh. I thought I was the only one that kind of stuff happens to. Sorry brother.
 

Snoopy1

640cc Uber Pimp
Thanks guys. Moving forward.... The fuse sides have been liberated from the offending firewall. Now to go cut out a new firewall. Good practice.:black-eye:

View attachment 109220
Sorry to see the mistake but it has happened to all of us and it does not look like it took a long time to fix and most important you still had sufficient material to make another one. Interesting to follow.
 
Top