You are using an out of date browser. It may not display this or other websites correctly.
You should upgrade or use an alternative browser.
You should upgrade or use an alternative browser.
Pilot 40% 330 Recover and Build
- Thread starter stangflyer
- Start date
stangflyer
I like 'em "BIG"!
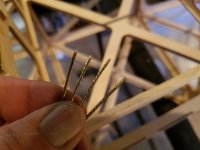
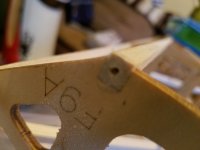
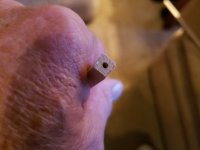
Evening gents. Been pre-occupied with so many other projects however I did manage to find a few hours to work on the 330 today. Between errands and other things that is. I wanted to get the broken/cracked stringers on the bottom of the fuse taken care of first. As is usually the case, the 330 had been picked up from the bottom and we all know what that does to those balsa stringers along the bottom. I am constantly catching myself before I even reach for one of my planes to remember, "Not from the bottom Moron". LOL. I have learned with each airframe there is different ways to move them around without grabbing on to the bottom. As with each picture you all will see the three stringers I intended to replace. I decided to extend the repair/replacement a little further so that I could be sure I could get a good joint. Instead of replacing the broken stringers with balsa, I decided to "beef" up the bottom a bit. And since I had some left over 1/4" Spruce stringers, that is what I used. I drilled the "receiving" end of the stringers and also the replacement stringers as well. Then "pinned" them with "pull/pull" cable sections. Normally I would "angle" cut the stringers then section the new ones in. But really I didn't want to add a bunch of supports to keep the structural integrity the same. So I chose to "butt" join them with the cable pins to tie them together. Then simple little "saddles" for the replaced stringers. Once I had the cable pins glued in place along with the spruce stringers, I tested the strength of the joints and I was pretty impressed of how solid "and" strong the joints are. I'm sure the bottom stringers are responsible for very little structural strength, but more over for fuse shape when covered.
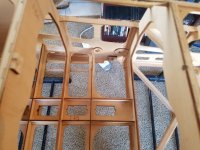
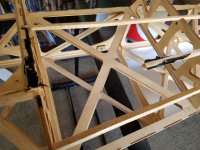
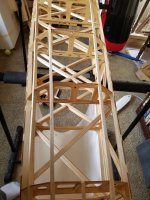
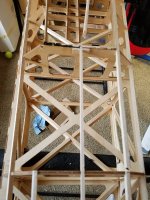
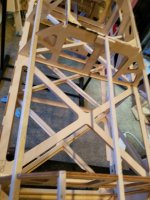
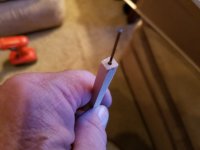
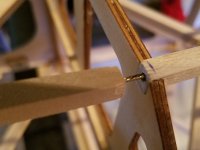
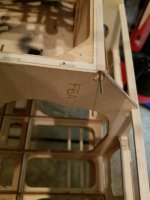
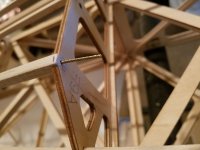
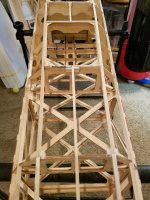
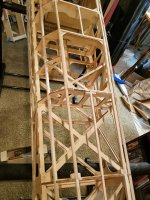
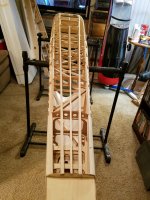
I am pleased with how nice the bottom of the fuse looks now. A little light sanding to knock off the previous covering adhesive and she will be ready for covering. I did however notice there is a couple of bad spots on the forward fuse sheeting. So I will remove the complete sections on both sides and replace it with new balsa sheeting. I still have to fix that one little bad area on the fin, but really not that big of a deal.
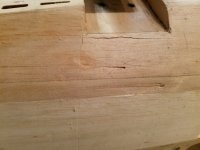
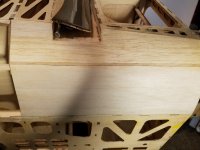
My plan is to get the bad sections of forward fuse sheeting and the fin sheeting replaced/repaired in the next couple of days. Then go over the fuse one more time before I do the final clean up before the covering. Then on to stripping the wings/ailerons, stabs/elevators and rudder. One other thing I will need to address is the firewall. This plane was set up for devoted IMAC flying. Hence, the thrust angles on the firewall are completely wrong for me and will have to be changed. Right now it has way too much down thrust and way too much right thrust. I am going to remove the firewall, reset the angles to "0" down thrust and 1.5-2.0 degrees right thrust.
More later everyone....


I am pleased with how nice the bottom of the fuse looks now. A little light sanding to knock off the previous covering adhesive and she will be ready for covering. I did however notice there is a couple of bad spots on the forward fuse sheeting. So I will remove the complete sections on both sides and replace it with new balsa sheeting. I still have to fix that one little bad area on the fin, but really not that big of a deal.


My plan is to get the bad sections of forward fuse sheeting and the fin sheeting replaced/repaired in the next couple of days. Then go over the fuse one more time before I do the final clean up before the covering. Then on to stripping the wings/ailerons, stabs/elevators and rudder. One other thing I will need to address is the firewall. This plane was set up for devoted IMAC flying. Hence, the thrust angles on the firewall are completely wrong for me and will have to be changed. Right now it has way too much down thrust and way too much right thrust. I am going to remove the firewall, reset the angles to "0" down thrust and 1.5-2.0 degrees right thrust.
More later everyone....
Snoopy1
640cc Uber Pimp
Like the idea with the wire but why would you not use a short solid carbon rod, just trying to understand the thought process.Evening gents. Been pre-occupied with so many other projects however I did manage to find a few hours to work on the 330 today. Between errands and other things that is. I wanted to get the broken/cracked stringers on the bottom of the fuse taken care of first. As is usually the case, the 330 had been picked up from the bottom and we all know what that does to those balsa stringers along the bottom. I am constantly catching myself before I even reach for one of my planes to remember, "Not from the bottom Moron". LOL. I have learned with each airframe there is different ways to move them around without grabbing on to the bottom. As with each picture you all will see the three stringers I intended to replace. I decided to extend the repair/replacement a little further so that I could be sure I could get a good joint. Instead of replacing the broken stringers with balsa, I decided to "beef" up the bottom a bit. And since I had some left over 1/4" Spruce stringers, that is what I used. I drilled the "receiving" end of the stringers and also the replacement stringers as well. Then "pinned" them with "pull/pull" cable sections. Normally I would "angle" cut the stringers then section the new ones in. But really I didn't want to add a bunch of supports to keep the structural integrity the same. So I chose to "butt" join them with the cable pins to tie them together. Then simple little "saddles" for the replaced stringers. Once I had the cable pins glued in place along with the spruce stringers, I tested the strength of the joints and I was pretty impressed of how solid "and" strong the joints are. I'm sure the bottom stringers are responsible for very little structural strength, but more over for fuse shape when covered.
View attachment 101545 View attachment 101546 View attachment 101547 View attachment 101548 View attachment 101549 View attachment 101550 View attachment 101551 View attachment 101552 View attachment 101553 View attachment 101554 View attachment 101555 View attachment 101556 View attachment 101557 View attachment 101558 View attachment 101559
I am pleased with how nice the bottom of the fuse looks now. A little light sanding to knock off the previous covering adhesive and she will be ready for covering. I did however notice there is a couple of bad spots on the forward fuse sheeting. So I will remove the complete sections on both sides and replace it with new balsa sheeting. I still have to fix that one little bad area on the fin, but really not that big of a deal.
View attachment 101560 View attachment 101561
My plan is to get the bad sections of forward fuse sheeting and the fin sheeting replaced/repaired in the next couple of days. Then go over the fuse one more time before I do the final clean up before the covering. Then on to stripping the wings/ailerons, stabs/elevators and rudder. One other thing I will need to address is the firewall. This plane was set up for devoted IMAC flying. Hence, the thrust angles on the firewall are completely wrong for me and will have to be changed. Right now it has way too much down thrust and way too much right thrust. I am going to remove the firewall, reset the angles to "0" down thrust and 1.5-2.0 degrees right thrust.
More later everyone....
stangflyer
I like 'em "BIG"!
The carbon rod would and was my first choice. Unfortunately I had none at my disposal and being Sunday, impossible to locate. So I used the cable.Like the idea with the wire but why would you not use a short solid carbon rod, just trying to understand the thought process.
stangflyer
I like 'em "BIG"!
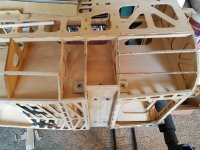
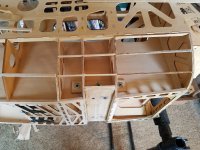
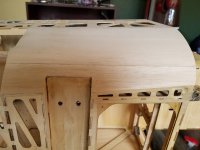
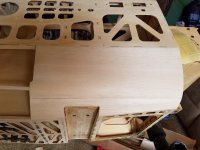
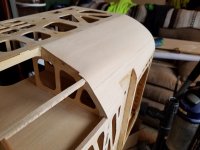
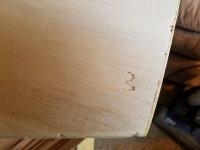
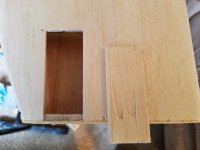
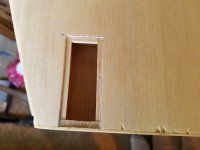
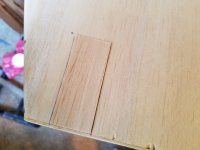
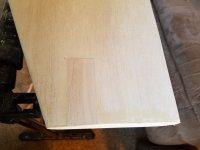
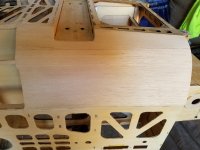
Rain day from work today. So you all know what that means. I made progress on the 330 fuse today. I actually found one more bottom/rear center stringer that the glue joint had popped loose on. Also, one other area of concern I wanted to address. So, lets get with it right? I started with the right lower front fuse sheeting first. Carefully sliding my hobby knife between the sheeting and fuse side. Slowly cut it away and removed it then I could get to what needed to be done. I am glad I removed it (sheeting) rather than to just attempt a "glue" fix. I discovered a tiny balsa stringer that was fractured and figured I would just replace them both before re-sheeting it. Once the stringers were replaced, I made up the required size of sheets to replace the old cracked ones, then set about to gluing, sanding and shaping them. Once the right side was done, I decided to get that silly cracked fin sheeting repaired. I cut out the required size to remove the cracked sheeting, cut a replacement piece then glued it in, sanded it and done. Why....???? Why oh why do some people have to "pinch" their rides so hard? LOL. Next up was to repair the left lower fuse side sheeting. At first I thought I would be able to get away with just simply "weeping" CA into the cracked joint. But after looking at it and pushing on the sheeting slightly, I could tell it would not be long before it was in need of replacement. Might just as well do the full repair now like the right side and get it out of the way. Which I did. After that, I went over the fuse with a fine toothed comb. Not leaving anything to chance or half-assed. If it had so much as even a scratch, I took care of it. The 330 fuse is now pretty much done except to do one more 400 grit final sand and wipe it off for covering.
In working on the 330 fuse, it brought back memories of the SD 260 (Baby) and the Behemoth Yak (1). When I stripped those down to do the recover I had a "LOT" to accomplish before I could even think about covering them. But the 330 is in so much better shape than they "WERE", I really don't have much to do to get them ready.
Sounds like we are working tomorrow so I probably won't get back to the 330 until tomorrow night. My plan is to strip the Rudder, stabs/elevators and wings/ailerons. A little at a time will lead to an eventual completed project. That is what I keep telling my self. Ha! I want to fly it...."NOW"! LOL
More later....
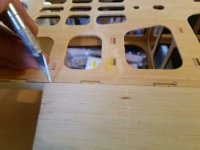
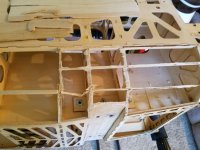
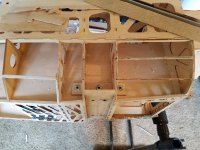


acerc
640cc Uber Pimp
Looking great @stangflyer. It is amazing at just how much even gently handling can damage these birds over time.
stangflyer
I like 'em "BIG"!
I have to agree with you. I am only speaking for myself, but when I reach for any of my planes I make a mental note to "NOT" grab too hard or pinch too hard. And I am extremely anal and careful with my planes. But I know that it happens. And to that, I would bet that 99% of all used planes could use a little TLC if they are every stripped for recover. Just part of the hobby.Looking great @stangflyer. It is amazing at just how much even gently handling can damage these birds over time.
Snoopy1
640cc Uber Pimp
I have to agree with you. I am only speaking for myself, but when I reach for any of my planes I make a mental note to "NOT" grab too hard or pinch too hard. And I am extremely anal and careful with my planes. But I know that it happens. And to that, I would bet that 99% of all used planes could use a little TLC if they are every stripped for recover. Just part of the hobby.
This must be prominent on larger planes. Lifting a 40 pound plane carefully takes a little thought trying not to break 1/4 stringers. But Evan so to lift a 40% plane you still need to lift from the bottom. You would think that the manufacturers would put a little more strength across the bottom to prevent this from happening.

 .
. .
.