• If you are new to GiantScaleNews.com, please register, introduce yourself, and make yourself at home.

    We're 1st in Giant Scale RC because we've got the best membership on the internet! Take a look around and don't forget to register to get all of the benefits of GSN membership!

    Welcome!

Scale RCM 1/3 Scale Champ Build

TonyHallo

150cc
The fabric arrived today, put the top fabric on and shrunk all the fabric to 250 degrees. Then started on the inspection rings. I really do like the way the rings look when covered with the doily. Four are done, nine more to go, it takes 15 minutes or so to get the doily ironed down around the inspection ring since only working with the tip of the iron. I enjoy every one of them.

IMG_3110.jpg
IMG_3112.jpg
 
looking good, Tony. I bought Profi2 fabric that is self-adhesive. Highly recommended by a couple of scale masters in my club. I tried it on the rudder and ailerons so far and it's easier than monokote.
Are those the inspection rings from iflytaillies?
 

TonyHallo

150cc
Yes, I got the rings are from IFlyTallies. The rings are laser cut material, reminds me of gasket sheet material. You could 3D print rings if you are in to that. I still have a few left or I would be looking at buying a printer. I tried to buy rings from Balsa USA but they never responded to my email request.
How do you plan to finish off the scale details with the Profi2 fabric? It is something I never heard of before so I learned something today, thanks Bill.
 

TonyHallo

150cc
The tapes are done on except for the 2" perimeter tape in theses photos. The two wide scale tape was just recently offered by F&M, all the previous builds were done with 1" wide tape. I'm kind of excited about laying down the 2" tape.
Yesterday I discovered the front tongue that slides into the fuselage is cracked, I suspect this was caused two years ago when dinked up the plane on a hard landing. During that time the rear tongue was cracked and it was repaired by drilling two 1/8" holes into the full spar area and epoxy in two pieces of music wire . Looks like a drill jig is in order. Servo access was added since one servo had failed before, the access door is made from .015" aluminum sheet. Hope I never need it.

IMG_3116.jpg
IMG_3117.jpg
 

TonyHallo

150cc
The 2" perimeter tape is installed one piece from the root to the outer end of the aileron . The top reference line was laid out 1" above the centerline of the leading edge. The tape was cemented to the top side only along the leading edge, then cemented to the wing tip at the centerline. The tape kicks up at the tip so there is extra material to shrink in this kick area. The iron was set to 250f and the top of the tip area was shrunk down and cemented in place. The wing was flipped over and the tip area was shrunk down and cemented before finishing off the bottom half of the leading edge. I am pleased the way it turned out.
On to the left wing.
I had set a goal to have the Champ wings, Cherokee fuselage, and the Super Cub fuselage ready for paint when the weather breaks and it looks like I will be busy in April.

IMG_3118.jpg
IMG_3120.jpg
IMG_3121.jpg
IMG_3122.jpg
 
Last edited:
Yes, I got the rings are from IFlyTallies. The rings are laser cut material, reminds me of gasket sheet material. You could 3D print rings if you are in to that. I still have a few left or I would be looking at buying a printer. I tried to buy rings from Balsa USA but they never responded to my email request.
How do you plan to finish off the scale details with the Profi2 fabric? It is something I never heard of before so I learned something today, thanks Bill.
Hi Tony. Your covering job is looking good. I haven't thought too much about the rings. I'm a long way off from attaching those. I might try thin white plastic if I can find a couple of hole saws in the right sizes that won't tear the edges of the plastic up. I plan to use Pink-it tapes for the taping, however my mentor suggested I get a pair of 2mm pinking shears and cut my own out of the leftover covering material. Unfortunately, I worked out the cutting patterns and there won't be much left over. I worked out the cost of buying an extra roll of Profi2 vs the pre-cut tapes from Pink-it and it was much cheaper to go with the pre-cuts. I won't use screws in place of stitching on the ribs because they are 1/8" balsa and they would probably split, but I think I can use the cut off heads of small brass escutcheon pins. I used the full pins on the doors to attach the aluminum and they look great.

did you see how the Profi2 looked on my rudder and ailerons?
btw, I'm gonna PM you about your elevator trim tab.
 

Attachments

  • Profi2on control surfaces.jpg
    Profi2on control surfaces.jpg
    93.6 KB · Views: 139
Last edited:

TonyHallo

150cc
I would go crazy cutting all the tapes, I just used a 25 yard roll of 3/4" on the right wing. I find almost impossible to cut a straight line, cut a few short pieces of bias tape for rudder leading edge but that's it. Didn't know they made 2mm pinking shears, just recently found 3 mm thanks to dhal22.
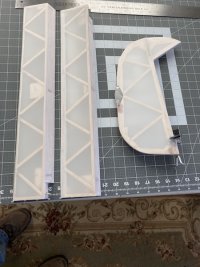
Here is the drill jig used to drill the tongue. The drill guide block are maple motor mount stock, the holes were drilled slowly in the mill with the bit chucked up short then extended as the hole got deeper. Drilled 6 1/2" deep and didn't pop out, think I got lucky. I may just go aheead and drill the left wing before it is covered.
IMG_3124.jpg
IMG_3123.jpg
 

TonyHallo

150cc
Well here we are, 10 days, 3 yards of fabric, little more than pint of EcoBond, 825 #0 button head screws, 50 yards of 3/4" tape, 5 yards of 2" tape, 12 1/2" chip brushes, 25 single edge razor blades, a couple rolls of shop towels and paper towels, and the wings are covered ready for heat smoothing.

IMG_3136.jpg
 
Top