You are using an out of date browser. It may not display this or other websites correctly.
You should upgrade or use an alternative browser.
You should upgrade or use an alternative browser.
3D Viper-ST 100-120cc scratch build......it continues!
- Thread starter Terryscustom
- Start date
Terryscustom
640cc Uber Pimp
Will the Kit come with a print version of this thread? Will the cowls come with a painted scheme on them or raw fiberglass? Will it have a wing tube and landing gear? I am exercising my check writing finger as I type")
No, this will be a "not so short" short kit. It will come with:
- all laser parts
- foam
- canopy
- cowl
- basswood blocks and tri-stock
- spruce longerons
- aluminum angle for landing gear.
- .pdf drawings for wing dimensions and also instructions (largely already covered here).
You will need your landing gear, hardware, Wing tube / stab tube (with sleeves), wing sheeting and 1/2" hinge stock material.
Paint and covering, obviously.
That's like a medium kit.No, this will be a "not so short" short kit. It will come with:
- all laser parts
- foam
- canopy
- cowl
- basswood blocks and tri-stock
- spruce longerons
- aluminum angle for landing gear.
- .pdf drawings for wing dimensions and also instructions (largely already covered here).
You will need your landing gear, hardware, Wing tube / stab tube (with sleeves), wing sheeting and 1/2" hinge stock material.
Paint and covering, obviously.
Terryscustom
640cc Uber Pimp
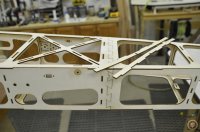
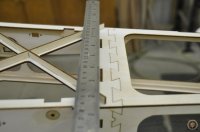
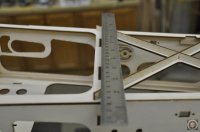
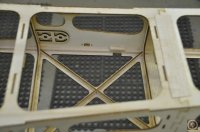
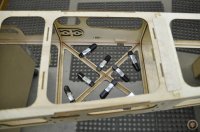
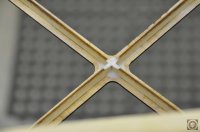
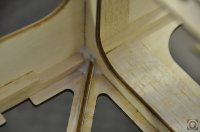
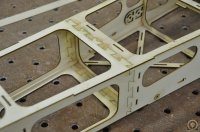
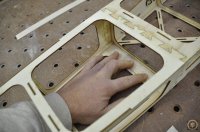
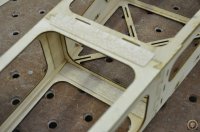
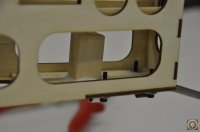
Time to finish the fuse! The last actual parts to the fuselage are the cross members on the top plate and adding some sheeting to the dovetail joints that were assembled back in the first step.
Assemble them on the outside of the fuse to be able to see how they work better. Use a straight edge and transfer a line, inline with the formers on the front and back of these sticks. This will get you close. Cut these off at an angle even with the formers. Sand the angles with a block until the fit the underside of the fuse, between the formers. Glue them in place. Since I used medium CA I used some microballoons to form some fillets in the center and at the ends.
Assemble them on the outside of the fuse to be able to see how they work better. Use a straight edge and transfer a line, inline with the formers on the front and back of these sticks. This will get you close. Cut these off at an angle even with the formers. Sand the angles with a block until the fit the underside of the fuse, between the formers. Glue them in place. Since I used medium CA I used some microballoons to form some fillets in the center and at the ends.
Attachments

Terryscustom
640cc Uber Pimp
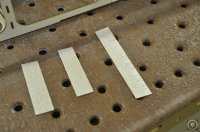
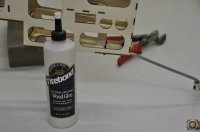
Now we need to add some support to the dovetail joints. I've done this several ways but my favorite is either with 6-8oz fiberglass cloth with either epoxy resin or medium CA. Since I have lots of scraps of 1/16" balsa I'm using a pc. of end grain or slightly dense wood installed with medium CA. Kicker is just fine on these if you like. On the bottom of the fuse, keep the filler 1/2" from the edges to allow for the foam. You could put this on the inside but it looks better when you are all done if you put it on the bottom.
Attachments
Terryscustom
640cc Uber Pimp
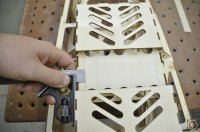
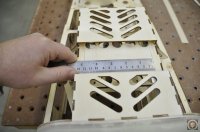
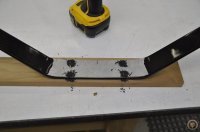
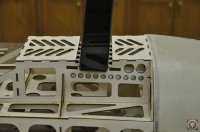
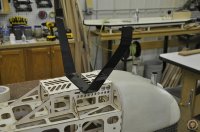
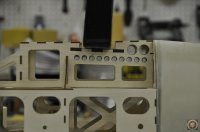
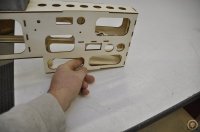
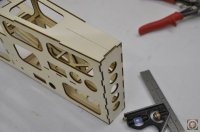
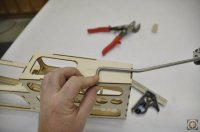
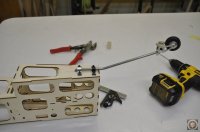
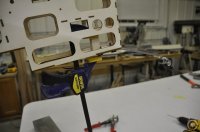
Next, mount the landing gear. I prefer the 35% Carden gear from graphtec (40% gear also works well). You can also use almost any replacement gear for any 35% ARF, or if you want aluminum gear I suggest TNT landing gear.
Draw a line 9/16" in from the edges of the landing gear plate. Find the center of the gear and draw some lines on it to match. Mark and drill four holes.....I suggest starting with 1/8" bit. Center the gear on the gear plate and use the drill bit to just barely mark the gear plate. Drill the gear plate. Enlarge the holes to your choice of hardware, although I recommend #10 or 1/4" bolts, washers and nylock nuts.
The gear plate is canted 2 degrees forward which adds some extra shock absorption effect.....puts the landing gear to better use as a spring.
Attachments
-
 _DSC0180.JPG50.2 KB · Views: 542
 -
 _DSC0181.JPG81.3 KB · Views: 543
 -
 _DSC0182.JPG79.3 KB · Views: 526
 -
 _DSC0183.JPG71.4 KB · Views: 525
 -
 _DSC0184.JPG65.7 KB · Views: 534
 -
 _DSC0185.JPG73.8 KB · Views: 515
 -
 _DSC0186.JPG71.5 KB · Views: 555
 -
 _DSC0187.JPG78 KB · Views: 524
 -
 _DSC0188.JPG93.6 KB · Views: 532
 -
 _DSC0189.JPG60.6 KB · Views: 552
Terryscustom
640cc Uber Pimp
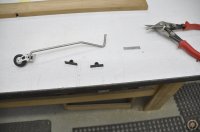
Now the tailwheel, IMHO the best option available is the J&J wheels with the metal spring. White Rose is a close second choice, but depending on your flying style I strongly recommend the metal spring. They will last a lifetime and are worth the money.
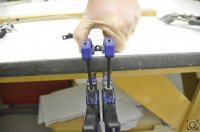
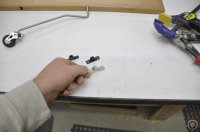
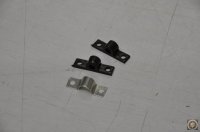
J&J has since converted their straps to metal but I had one with the old plastic straps so I thought I'd show how to keep them from breaking. The front one (closest to the elbow) needs to have a metal strap applied to it. This can be made from something as simple as a beer can. I used some .040 aluminum sheet, and it only takes about two minutes to make them. Cust a strip and use some hand clamps to "pull" the aluminum over the plastic keeper. Trim and sand the edges, drill a couple holes and done. This can also be done on a tailwheel where you may have misplaced the straps.
There is a pc. of birch plywood for a tailwheel plate doubler. You must install this, and it is slightly over-sized so you can trim to fit. Mark and drill a 1/4" hole through the bottom taking into consideration that there will be 1/2" rudder hinge stock added to the trailing edge of the fuse.
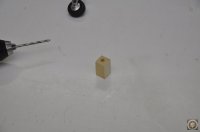
Install some 6-32 blind nuts, capscrews and bonded washers. Next drill a 1/4" hole in a 3/4" x 3/4" pc. of wood (I used basswood). Glue and clamp in place with some wood glue (non hardening glue if you have it). Wood glue will not stick to the tailwheel arm so you can turn it and it will pull right out.
J&J has since converted their straps to metal but I had one with the old plastic straps so I thought I'd show how to keep them from breaking. The front one (closest to the elbow) needs to have a metal strap applied to it. This can be made from something as simple as a beer can. I used some .040 aluminum sheet, and it only takes about two minutes to make them. Cust a strip and use some hand clamps to "pull" the aluminum over the plastic keeper. Trim and sand the edges, drill a couple holes and done. This can also be done on a tailwheel where you may have misplaced the straps.
There is a pc. of birch plywood for a tailwheel plate doubler. You must install this, and it is slightly over-sized so you can trim to fit. Mark and drill a 1/4" hole through the bottom taking into consideration that there will be 1/2" rudder hinge stock added to the trailing edge of the fuse.
Install some 6-32 blind nuts, capscrews and bonded washers. Next drill a 1/4" hole in a 3/4" x 3/4" pc. of wood (I used basswood). Glue and clamp in place with some wood glue (non hardening glue if you have it). Wood glue will not stick to the tailwheel arm so you can turn it and it will pull right out.
Attachments
-
 _DSC0190.JPG68.6 KB · Views: 494
 -
 _DSC0191.JPG62.1 KB · Views: 534
 -
 _DSC0192.JPG64.9 KB · Views: 547
 -
 _DSC0193.JPG62.7 KB · Views: 547
 -
 _DSC0194.JPG66.7 KB · Views: 519
 -
 _DSC0195.JPG52.1 KB · Views: 544
 -
 _DSC0196.JPG36 KB · Views: 510
 -
 _DSC0197.JPG62.9 KB · Views: 545
 -
 _DSC0198.JPG52.3 KB · Views: 551
 -
 _DSC0199.JPG64 KB · Views: 523
 -
 _DSC0200.JPG52 KB · Views: 561
 -
 _DSC0201.JPG44.9 KB · Views: 524
 -
 _DSC0206.JPG65.2 KB · Views: 508
Terryscustom
640cc Uber Pimp
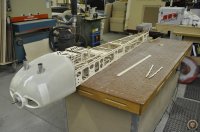
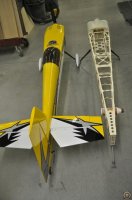
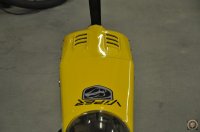
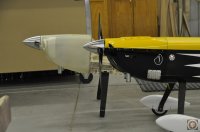
And this concludes the fuselage assembly!! I had the Viper-ST 3.0 in the trailer so I got it out to do a few comparison pictures.
And before anyone asks, yes I am going to work on a mold to make the top vents out of fiberglass that can be applied to the cowl before painting. However I am not making any promises for this year. It may take a few tries because they are quite detailed and if they don't come out good, I won't offer them.

And before anyone asks, yes I am going to work on a mold to make the top vents out of fiberglass that can be applied to the cowl before painting. However I am not making any promises for this year. It may take a few tries because they are quite detailed and if they don't come out good, I won't offer them.
Attachments

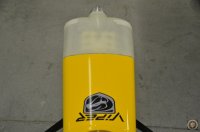
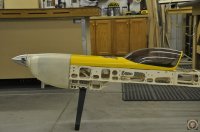
Jetpainter
640cc Uber Pimp
That new cowl looks great. It really follows the shape well. I never liked when a cowl pinches in at the nose. The new one looks nice and Smoooooth.