• If you are new to GiantScaleNews.com, please register, introduce yourself, and make yourself at home.

    We're 1st in Giant Scale RC because we've got the best membership on the internet! Take a look around and don't forget to register to get all of the benefits of GSN membership!

    Welcome!

3D Viper-ST 100-120cc scratch build......it continues!

Terryscustom

640cc Uber Pimp
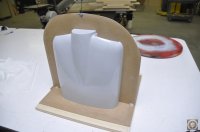
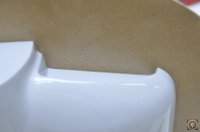
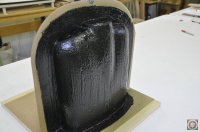
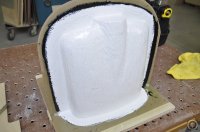
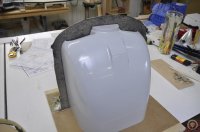
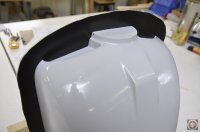
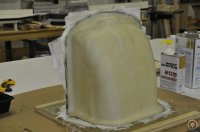
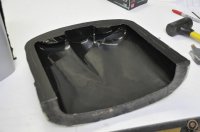
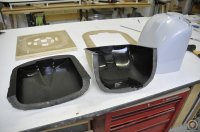
OK, little worried and a little excited I had an hour to come to the shop before we leave for the day.    Epoxy primer rocks!!!     Seriously, it's hard as a freakin rock.      I sprayed a little water on the front and it it with some wet/dry 220....no clogging!     So, 20 minutes later it's all sanded down.     Found three small pin holes with only one being where it matters, so I put a dab of red spot filler in that.     I marked a couple of other spots that need more attention with a red marker.

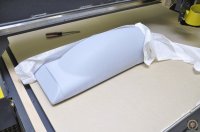
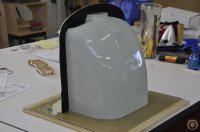
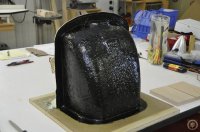
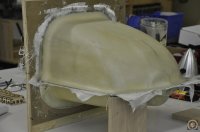
Tomorrow a little more 220, a little once over with 280 and then cross sanding with 320 to aid air release......ready to make parts!

banana-dancing-with-mario-smiley-emoticon.gif
dancing-chicken.gif
devil.gif


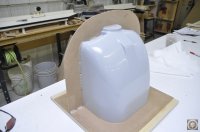
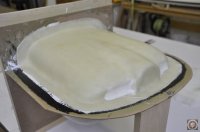
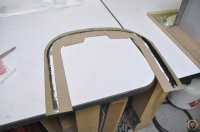
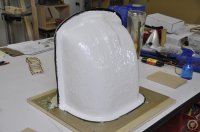
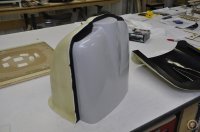
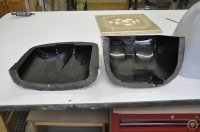
Sorry, I'm excited....had this plug under my bench for two years and thought it was no longer usable.      Really glad to see it come back to life.
DSC0154.JPG
 

tylerzx9r

100cc
Nice Job! everything looks as expected from the Custom Crew! If it is anything like the actual planes I have seen, it will be nothing less than the best. As excited as you are.... picture the people that want to get their mitts on one for themselves
winking-thumbs-up-smiley-emoticon.gif
 

Jetpainter

640cc Uber Pimp
An easy way to find all your pinholes is to take a strong narrow beam flashlight and shine it at a 90 degree angle across the surface. Even the really small pinholes will jump right out at you. It works best with fresh primer before you sand. I then fill them with glaze before doing my sanding. A lot of the time for small areas I use a razor blade as the spreader because its easy to control how much your putting on.
 

Terryscustom

640cc Uber Pimp
+1 on the light.     I keep a small chicken light with a halogen bulb on the side of my sanding table and use it a lot in every day sanding work.
 

Terryscustom

640cc Uber Pimp
Well, little more massaging with paper and water and the canopy plug is all ready to rock. Cowl and parting board are all set up, cracks filled with clay and awaiting the UPS dude with a box of goodies. Hoping to spray PVA tomorrow AM. Have a little road trip to Council Bluffs to pick up a plane I purchased and back to hopefully lay up the first side of the mold, if not....first thing Saturday AM.
 

Attachments

  • image043.jpg
    image043.jpg
    56.7 KB · Views: 237
  • image044.jpg
    image044.jpg
    40.4 KB · Views: 241
  • image045.jpg
    image045.jpg
    69.2 KB · Views: 228
  • image046.jpg
    image046.jpg
    71.6 KB · Views: 235
Last edited:

Terryscustom

640cc Uber Pimp
Couple of nervous days but I have a usable mold for the cowl (insert 1000 dancing chickens here).

I have two small blemishes on the bottom but very small. I'll probably lay myself up a cowl and just put some filler in them and I'll chat with Rick about fixes to the mold when I see him in a couple of weeks. It is 100% usable though and the plug came out with very very minor damage that can be repaired. Only damage is from me grabbing it and putting a couple of small dents in it and I accidentally pushed the front on the table and dented it. So, foam plug is a great idea.....just need to use a bit more sense when removing the mold
icon_wink.gif


PICS!!!!!
 

Attachments

  • image047.jpg
    image047.jpg
    84.8 KB · Views: 234
  • image048.jpg
    image048.jpg
    89.5 KB · Views: 218
  • image049.jpg
    image049.jpg
    60.5 KB · Views: 208
  • image050.jpg
    image050.jpg
    64.5 KB · Views: 249
  • image051.jpg
    image051.jpg
    74.7 KB · Views: 237
  • image052.jpg
    image052.jpg
    46.5 KB · Views: 210
  • image053.jpg
    image053.jpg
    65.5 KB · Views: 230
  • image054.jpg
    image054.jpg
    102.6 KB · Views: 211
  • image055.jpg
    image055.jpg
    76.3 KB · Views: 218
  • image056.jpg
    image056.jpg
    76 KB · Views: 241
  • image057.jpg
    image057.jpg
    79.1 KB · Views: 208
Last edited:

Terryscustom

640cc Uber Pimp
Probably wet sand out the slight glass texture that transferred through and I'll prep the mold to lay up a cowl in a day or so when I have time

More pics:
 

Attachments

  • image058.jpg
    image058.jpg
    67.7 KB · Views: 224
  • image059.jpg
    image059.jpg
    55.5 KB · Views: 199
  • image060.jpg
    image060.jpg
    77.7 KB · Views: 231
  • image061.jpg
    image061.jpg
    68.6 KB · Views: 207
  • image062.jpg
    image062.jpg
    66.3 KB · Views: 202
  • image063.jpg
    image063.jpg
    91.2 KB · Views: 211
Last edited:
Top