You are using an out of date browser. It may not display this or other websites correctly.
You should upgrade or use an alternative browser.
You should upgrade or use an alternative browser.
3D Viper-ST 100-120cc scratch build......it continues!
- Thread starter Terryscustom
- Start date
Bartman
Defender of the Noob!
get on it!Looking forward to the new site.....few things to post from the last week!
Terryscustom
640cc Uber Pimp
OK!!! HERE WE GO!!! I backtracked and updated and updated the pics that were lost in the transition. This new site looks BAD ASS. So, I'll update with the last couple days posts that I put on my thread on "Sleeping Giants". Sheesh, mostly crickets chirping over there so I'm super happy to be back up here!!!!!!!
Terryscustom
640cc Uber Pimp
Well, another day when I got more work done on my toys than I should have.....
I sanded the inside of the molds form 280 all the way up to 1000 to get out the glass pattern that transferred from the plug......won't do that again. Next time better primer and if anything wet sand the plug more.
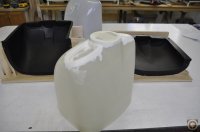
Waxed the mold three times. Prepped the mold with three coats of Frekote. This stuff is expensive but it is amazing. Supposedly you can get multiple pulls without reapplication once the mold is seasoned. A coat only takes about 60 seconds to apply and 3-4 minutes to dry so much faster than wax or PVA.
I also took the long route with this first cowl with an experiment. I mixed up a batch of resin and silica that basically makes a slimy mess looking mixture. I painted the inside of the mold and it hangs on all surfaces except sharp corners and for some reason the tight front area of my mold where I wanted it most. You have to babysit it with a brush for about an hour while it sets up. Occasionally brushing out where it separates from itself. This should yield a pin-hole free final cowl, however from my last visit to cowl making I know that there will be a dozen or so.
Once that's done it's basic FG layup, pat-down and wait to trim the overhang.
I'll lay up another one without the gelcoat process and with a layer of 2oz cloth and compare the final product for both finish and weight.
I sanded the inside of the molds form 280 all the way up to 1000 to get out the glass pattern that transferred from the plug......won't do that again. Next time better primer and if anything wet sand the plug more.
Waxed the mold three times. Prepped the mold with three coats of Frekote. This stuff is expensive but it is amazing. Supposedly you can get multiple pulls without reapplication once the mold is seasoned. A coat only takes about 60 seconds to apply and 3-4 minutes to dry so much faster than wax or PVA.
I also took the long route with this first cowl with an experiment. I mixed up a batch of resin and silica that basically makes a slimy mess looking mixture. I painted the inside of the mold and it hangs on all surfaces except sharp corners and for some reason the tight front area of my mold where I wanted it most. You have to babysit it with a brush for about an hour while it sets up. Occasionally brushing out where it separates from itself. This should yield a pin-hole free final cowl, however from my last visit to cowl making I know that there will be a dozen or so.
Once that's done it's basic FG layup, pat-down and wait to trim the overhang.
I'll lay up another one without the gelcoat process and with a layer of 2oz cloth and compare the final product for both finish and weight.
Attachments
-
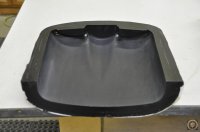 image064.jpg51 KB · Views: 473
 -
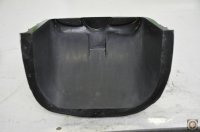 image065.jpg53.4 KB · Views: 434
 -
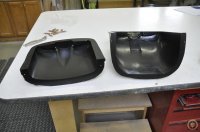 image066.jpg77.9 KB · Views: 497
 -
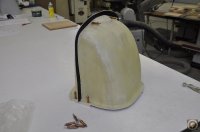 image067.jpg57.2 KB · Views: 445
 -
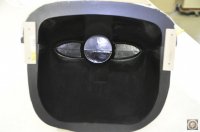 image068.jpg49.3 KB · Views: 478
 -
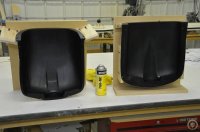 image069.jpg74.2 KB · Views: 988
 -
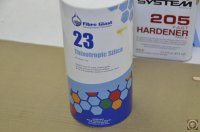 image070.jpg61.2 KB · Views: 447
 -
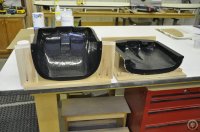 image071.jpg104.8 KB · Views: 479
 -
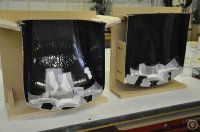 image072.jpg91.1 KB · Views: 435
 -
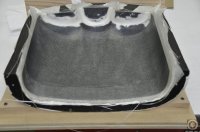 image073.jpg107.6 KB · Views: 471
 -
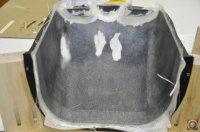 image074.jpg118.2 KB · Views: 451
Terryscustom
640cc Uber Pimp
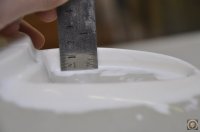
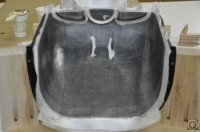
Cowl 1.0 is out of the mold and looking good. With a light I can count three pinholes but the sacrifice is weight and time spent up front. I'm going to roll into a second one with a slightly different technique on the filler since the front areas are very tight and deep I'm going to fill a syringe with filler and inject it in there slowly to keep from having bubbles. Also will help control the quantity a little bit better.
Cowl 1.0 is 15.1oz, little heavy but not terrible. My other ones were at least that heavy when nearly ready to paint. Stay tuned...
Cowl 1.0 is 15.1oz, little heavy but not terrible. My other ones were at least that heavy when nearly ready to paint. Stay tuned...
Attachments
Terryscustom
640cc Uber Pimp
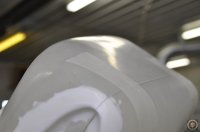
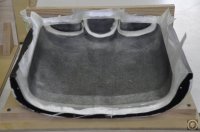
So my wife walks into the shop and what's the first thing she says when she sees the first cowl..........."Holy filler!!!".http://www.GiantScaleNews.com/forums/images/smilies/211.gif
Sheesh, can't catch a break around herehttp://www.GiantScaleNews.com/forums/images/smilies/199.gif. So I laid up another one and used the syringe deal and used less than half of the filler of the first one. I did do the gelcoat layer with Silica again just in case. I'll see the results of this one and I'll probably try a third without the gelcoat layer.
Sheesh, can't catch a break around herehttp://www.GiantScaleNews.com/forums/images/smilies/199.gif. So I laid up another one and used the syringe deal and used less than half of the filler of the first one. I did do the gelcoat layer with Silica again just in case. I'll see the results of this one and I'll probably try a third without the gelcoat layer.
Attachments
Terryscustom
640cc Uber Pimp
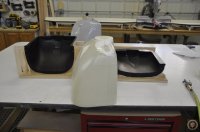
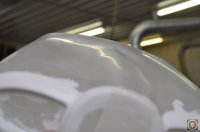
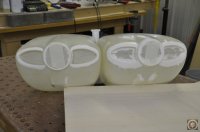
My second one looks a little less like a kindergartner did the filler LOL. However with the gelcoat it is still only .2oz lighter than the first try. Probably because the filler material is actually 75% micro balloons so there is basically no weight with that. Still happy, a cowl this size that is basically ready to scuff and prime and weighs 15oz without the holes cut in the front.
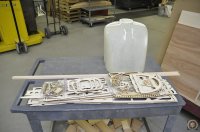
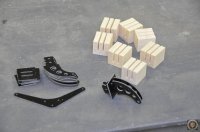
So last night I cut myself a kit that I plan to start on later today if it works, but most likely tomorrow. I want to test fit my DA100L before I ship it back to DA for some service.
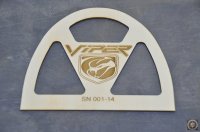
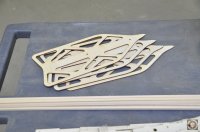
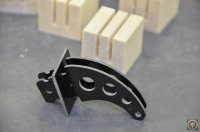
Pictured are all of the laser and CNC parts for the kit, including SFG's, CNC cut control horns with mounting blocks. The cowl ring is also flush fit to the back of the cowl so the cowl does not overlap the fuselagehttp://www.GiantScaleNews.com/forums/images/smilies/198.gifhttp://www.GiantScaleNews.com/forums/images/smilies/198.gifTakes extra time and effort to get tolerances that close, but hey.....if yer gonna do it, do it right is my motto.
So last night I cut myself a kit that I plan to start on later today if it works, but most likely tomorrow. I want to test fit my DA100L before I ship it back to DA for some service.
Pictured are all of the laser and CNC parts for the kit, including SFG's, CNC cut control horns with mounting blocks. The cowl ring is also flush fit to the back of the cowl so the cowl does not overlap the fuselagehttp://www.GiantScaleNews.com/forums/images/smilies/198.gifhttp://www.GiantScaleNews.com/forums/images/smilies/198.gifTakes extra time and effort to get tolerances that close, but hey.....if yer gonna do it, do it right is my motto.
Attachments


Last edited:
Jetpainter
640cc Uber Pimp
Sub