• If you are new to GiantScaleNews.com, please register, introduce yourself, and make yourself at home.

    We're 1st in Giant Scale RC because we've got the best membership on the internet! Take a look around and don't forget to register to get all of the benefits of GSN membership!

    Welcome!

89" SkyWing Laser 260 V2 Assembly Thread

Jetpainter

640cc Uber Pimp
DreamWorks RC
pbx_1132_a_6.jpg
 

AKNick

640cc Uber Pimp

I looked hard at attempting to justify my need for these little guys, and honestly it would be tricky to make it work in the 89" Laser due to the structure surrounding the fuselage sides. It's very weak for that type of load on it and the entry hole is below the deck so access is tricky. Seriously I've been trying very hard to figure out what I'm going to do... decided to just do something instead of drinking barley soda(s) looking at my plane in attempt to formulate a plan that I liked... It's done. regular MR30's in place of servo connectors and made the routing so it would not interfere with a pipe/can.... in which I haven't decided on. I'm thinking a DA70 Y 2-1 MTW RE3 or a JMB header with their can or see if I can use a RE3 with it instead. The Pipe Dia is a little different for the last combo, but the JMB has square ports instead of DA round... Is it performance or OCD - you tell me?
 

Snoopy1

640cc Uber Pimp
I looked hard at attempting to justify my need for these little guys, and honestly it would be tricky to make it work in the 89" Laser due to the structure surrounding the fuselage sides. It's very weak for that type of load on it and the entry hole is below the deck so access is tricky. Seriously I've been trying very hard to figure out what I'm going to do... decided to just do something instead of drinking barley soda(s) looking at my plane in attempt to formulate a plan that I liked... It's done. regular MR30's in place of servo connectors and made the routing so it would not interfere with a pipe/can.... in which I haven't decided on. I'm thinking a DA70 Y 2-1 MTW RE3 or a JMB header with their can or see if I can use a RE3 with it instead. The Pipe Dia is a little different for the last combo, but the JMB has square ports instead of DA round... Is it performance or OCD - you tell me?
As long as you are having it does not matter. Planning is half the fun.
 

AKNick

640cc Uber Pimp
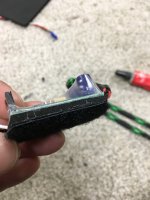
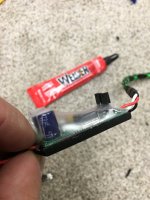
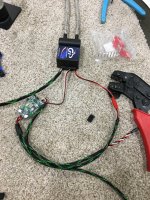
Got to play with the ignition module, mount and tech aero a bit.

added some 4mm foam to the bottom of the tech aero with welders glue, and slapped some Velcro on it. It will be Velcro’d next to the fuel tank.
Next I decided to crimp a JST connector onto the tech aero to match the GP ignition instead of using an adapter lead supplied with the ignition.
410240ED-A9D0-40AE-A458-5F701F6A9A0A.jpeg AA4D6E7B-CEA7-45F5-84A8-A190591C1AFE.jpeg 0B93ADAF-DA10-4AE4-AB50-670D3570D94B.jpeg


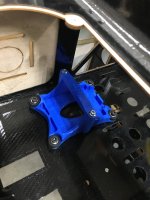
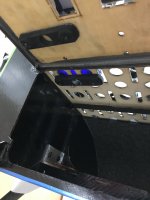
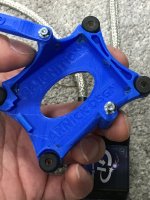
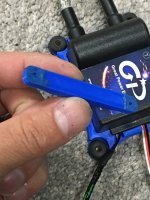
Found a place where I liked the ignition module to call home. This spot gave me plenty of ignition lead room and was spaced as far away from the other components as I could go. I liked the idea of putting it here away from the hot cylinder head.
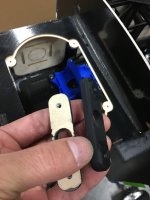
Made a plywood rail with 3mm blind nuts glued to the structure.
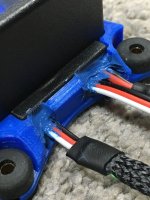
Put a dap of silicone in the corners, sides, and inner strap areas to prevent fretting.
Also decided to add some silicone to the wires where they exit as GP doesn’t have and rubber to prevent chafing on the leads.

AB267328-BEFE-40C0-BDF3-6391AB5380E7.jpeg 54AA8851-8526-45C7-AB03-5BFB24805E17.jpeg D321A974-56B5-485A-A9D4-1F89558C8D38.jpeg 85E3FB88-7C01-4F5E-8E0F-41A8F27E4E2E.jpeg 623E69DE-0CF5-4C65-B5DC-04176E5C9436.jpeg D78634C8-68DC-4213-865D-A7237D3922A6.jpeg
 

AKNick

640cc Uber Pimp
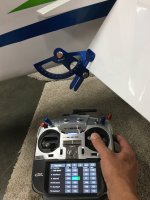
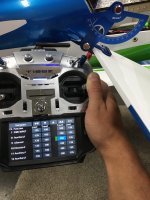
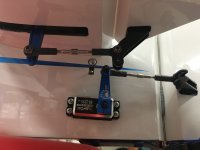
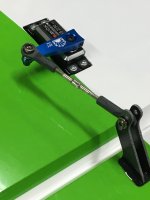
I struggled quite a bit to find the best geometry for the ailerons. The ball links would bind against the servo arm and/or the control horn.

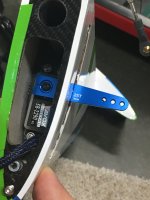
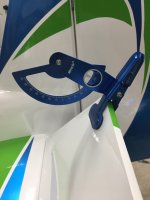
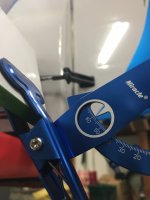
Bevel to bevel is 55 degrees. Most of us know that anything beyond 38 degrees slows down the roll rate and is just drag. Keeping that in mind I always like the surface to be able to travel bevel to bevel. My solution is this:

1.5” NWRC arm using the furthest outboard hole.

middle hole on the control horn.

endpoints are approx 90-110 to reach 38 degrees.

this accomplishes two things. Best servo resolution as I am allowing the servo to travel basically 100%
Last is geometry, using a smaller servo arm, and the middle hole of the control horn the linkage stays mostly parallel to its surface exempt at neautral which is perfect. 3D planes with large torque can get away with less than parallel linkages at neutral as there isn’t much load on it there. It’s at deflection what matters.

I originally posted in a FB skywing owners group a question about how other people had set up their 89” SW lasers and it turned into more of a deflection thread about everyone saying 38degrees is all you need. Gotta love it when folks don’t understand the question or own the plane and make an uneducated guess to prove they know something.

Had a few PMs from people trying to help me that actually owned the plane but said they didn’t want to hurt anyone’s feelings publicly LOL. Got the information and help I needed, but it was painful. LOL!

I’d come home from night shift trying to figure it out and left me dumbfounded. I tried different arms and settings but this was the best result.
8C038A3C-9BF0-4FE3-A1EE-41AD07F091D7.jpeg 6819508E-5AD9-4BF7-90D8-B6B4BCC3DDC7.jpeg 1DEAA4EE-7ECF-4E2F-9917-8929F000737B.jpeg
 

AKNick

640cc Uber Pimp
Onto the elevators.

2” NWRC servo arms. Using the middle hole (1.75”)

Lowest control horn hole. (Closest to the control surface).

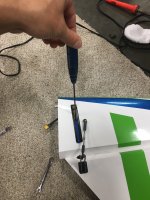
started by powering up the servo, making sure it goes in the right direction. And lightly putting the arm hold down screw in place prepped with locktite along with the pinch bolt.

D6FADA4A-F818-4918-B9C6-1ABE97887724.jpeg

Tighten the pinch bolt, then secure the hold down screw. Then adjust your sub trim to get the servo arm level (90 deg from the servo case).
FBFBB89A-CF6A-4984-85B0-370F7EE67F10.jpeg

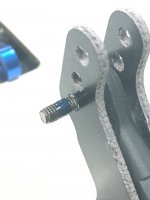
I add a little locktite on the lower/inner exposed threads on the screw so there isn’t any locktite in the fiber locking portion of the nut.
EE33EAD4-EE76-46A7-9549-40304439A90C.jpeg

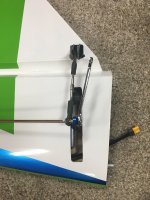
install the linkages.
E23AFCD3-89FB-410B-B1F4-710DBA416E4C.jpeg

bevel to bevel is 63degrees! I lowered it to 58 to match all directions without binding.

79B5963F-1A34-4B9A-8566-B3907847EA27.jpeg D7FDFFD2-C84D-4E3A-B951-6794DD794667.jpeg 4DD2A193-2F13-4CA5-9DF9-5EF31F6ECB45.jpeg

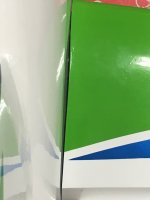
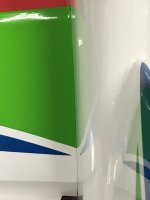
A little disappointed that the right elevator end rib doesn’t sit flush. Oh well.

B6B1C0AD-FCDE-494B-A59D-45CD4F0397FF.jpeg 4CC6C5EE-34FC-4638-9CB6-1ED75003B21B.jpeg
 

AKNick

640cc Uber Pimp
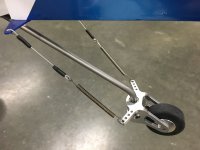
Finished installing my J&J Tailwheel by putting some springs on (from the timber... I lost the ones included.... whoops.)
I also managed to whistle up some brass tubing to make a wear sleeve so the cables don’t dig in. Then I thought, maybe I can put another tube inside of it and have a poor mans bearing LOL. Not sure if it will hold up at all... most likely fail. Should have soldered a washer to it to help keep it in place.

EF13A1D5-48F9-41AF-B9C1-EF2FF9E8322E.jpeg 36BE7E17-474F-47F3-AB21-600C0FAD1B99.jpeg
 

AKNick

640cc Uber Pimp
Waiting on parts again. So naturally what do I do??

design some air dams for the canister tunnel of course.

ready to try and print them... 8hours, we’ll see what happens.

1296F35C-0A38-486C-8B0E-E3C5B804F06D.jpeg
 

AKNick

640cc Uber Pimp
Starting to get ahead of myself! Realized I missed posting my aileron servo install, prep, and some finished product discrepancies found!

E37D5007-198E-43DD-BD9C-24074FCCB209.jpeg 3C316A89-C0B0-4F31-A532-E58A3F730DFF.jpeg EF1DEDA2-7C7C-473A-A075-338A9F94D20C.jpeg C6E8AA34-22EF-46BF-89E4-47E762752355.jpeg 189BE7C3-61C2-49FD-A67D-3F6F401E485D.jpeg

crack in the glass
0FC66079-F2BD-4E7D-99EC-70BBA6B11610.jpeg

not glued right, held it in place and glued.
8C55FE73-9363-4C0D-9AD2-0C05DED123C5.jpeg 74DDABA4-38A3-429F-9127-C0EEB082385B.jpeg

Gaps in the laminate
63761BBE-258E-4E32-AE04-116650DBEFA6.jpeg


000905D9-2250-4B96-BE39-5BA5FE8A9622.jpeg 6EB385DC-2B9E-47CB-A9A9-1C8AF9A4ABA5.jpeg 35E6EFFC-FD91-4592-8554-7DA0B178AEEE.jpeg B8BC7FAB-4341-4436-A1E6-95247D529ECF.jpeg F5195307-5CF0-47E3-9FBF-077CF43491B3.jpeg A5DBA10D-ADD5-4CA1-A83A-E77F972F23F3.jpeg
 
Top