• If you are new to GiantScaleNews.com, please register, introduce yourself, and make yourself at home.

    We're 1st in Giant Scale RC because we've got the best membership on the internet! Take a look around and don't forget to register to get all of the benefits of GSN membership!

    Welcome!

89" SkyWing Laser 260 V2 Assembly Thread

AKNick

640cc Uber Pimp
Not much progress lately... # adulting is getting in the way ha ha.

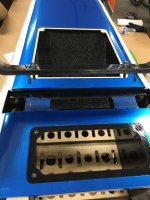
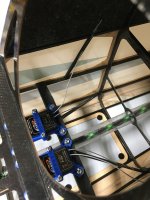
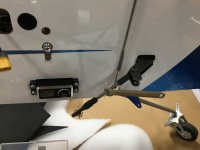
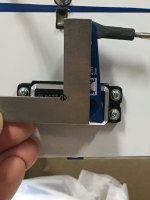
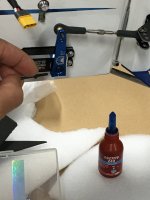
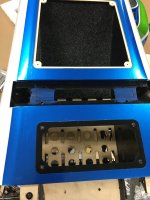
I noticed that the gear block has lightening holes in it. A little different!

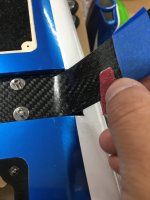
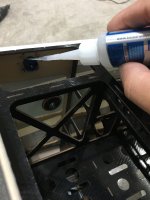
I like to smear a little silicone where the gear leg makes contact to the airframe to allow a little bit more vibration support.

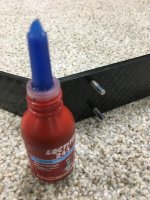
Put some blue locktite on the threads, and tightened the bolts. Note The pattern is different so you cannot install them backwards.

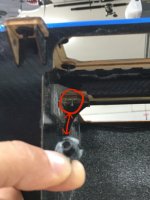
Had one T-Nut strip due to some poorly cut threads. I had a spare lying around so it wasn’t too big of a deal.
B3B7CF16-4309-482C-BF57-0CFB796D05DE.jpeg AD951870-0BDB-4247-B47B-18E1E6266524.jpeg 7813541C-F2DA-46BA-B365-4DE7E0D4FBB2.jpeg D5994A15-967E-44D6-B6AE-E44CFB53D9AF.jpeg
 

AKNick

640cc Uber Pimp
Put the gear leg fairings and wheels on! She’s now on her feet!

Marked where to sand with masking tape. Light scruffin
6E40B5FE-99CA-4844-8935-E9C7322A0C38.jpeg

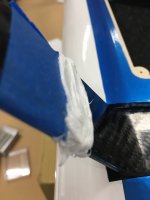
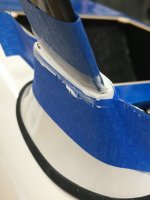
Put a wicked bead of white RTV down, if I had 5200 I would have used that instead. Used welders glue in the past builds with a lot of success.
DA95387A-3D59-4BAC-AFA1-A972E80085E5.jpeg

Taped down the fairing to the fuselage and wiped the excess sealant off and removed the bordering tape.
7D2B5A19-F650-4D87-AAE6-1A34A3CA28D4.jpeg

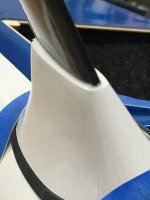
Final smear to make it look purdy
3D5CC10F-0CC1-4D31-8423-63EA96032F54.jpeg

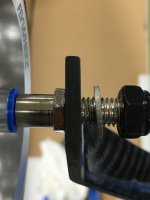
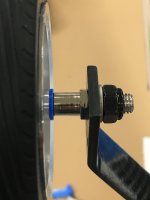
note I added a washer to go under the nut. Wish I had a thin one for the axel to butt up against but... oh well!
EFBFE2F2-257D-4F67-8204-0553E0F67998.jpeg

All snugged up!
D7C7649B-91BA-4B26-B05F-650087855DF9.jpeg
 

AKNick

640cc Uber Pimp
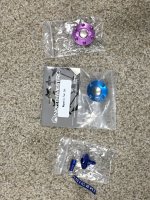
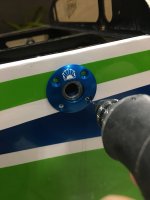
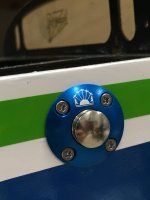
Fuel dot!! The ARF comes with a magnetic purple fuel dot (why purple!!?!!??!!) I’ve heard of guys sanding the purple off and painting or polishing. It’s a nice dot, but I wanted a blue one from NWRC.

Here's what you get: A purple fuel dot, and a blue vent.
D5FCA0BB-848B-411A-964C-A9CE9B1E6CA4.jpeg

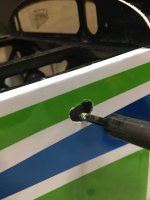
First things first, heat up the iron and melt out the hole slot provided... yes it's a perfect fit.
E21D86F9-0CEC-4643-8E77-ACA6EBA3BB4D.jpeg CE7B9232-2274-40D8-BAB0-947EA80FDC37.jpeg

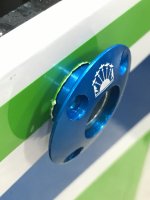
Drilled some new pilot holes, and locked the new screws in place with some CA on the back side.
044D579A-BB25-44C0-8108-49515F1F629E.jpeg 921F6C59-FDAD-449B-A72F-A3D444094E5E.jpeg B1C685FE-DBDE-485A-A743-8E2EF4B3A16D.jpeg
 
Last edited:

AKNick

640cc Uber Pimp
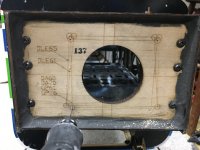
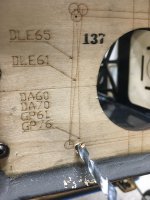
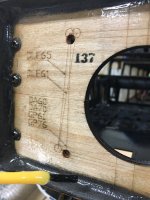
Time to drill the laser etched marks for the GP76. Start with a pilot hole and then enlarge with a drill bit matched for the mounting bolts. Then debur with A razor blade.

DC577A58-66C3-4E09-B20C-08C7DFF87BF5.jpeg 832D2E2F-A17C-41CF-AA10-86847345790F.jpeg

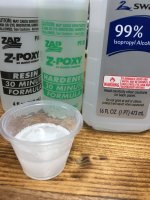
Thinned some 30min epoxy with some Isopropyl Alcohol and coated the exposed wood on the motor box firewall and the lower section as needed.

4A6A104B-99BF-47F5-B1E8-EF0F216889F4.jpeg E5500859-B574-461E-B730-901E69AFF562.jpeg
 

AKNick

640cc Uber Pimp
I let the cat out of the bag. When I purchased this model I also got it's little sister. The 60" Laser 260 V2, it's had about eight flights and still dialing it in. Looking forward to getting the big one going. waiting on some parts though.

So for now, here is the little gal in action:
 

pawnshopmike

Staff member
I let the cat out of the bag. When I purchased this model I also got it's little sister. The 60" Laser 260 V2, it's had about eight flights and still dialing it in. Looking forward to getting the big one going. waiting on some parts though.

So for now, here is the little gal in action:
Mikey like.:big_yes:
 

AKNick

640cc Uber Pimp
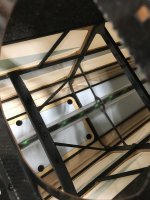
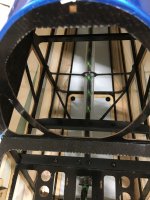
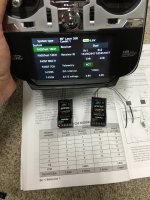
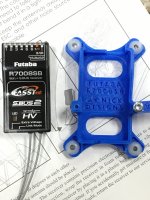
Finally came up with a way to mount my dual R7008SB receivers.
Made balsa wood standoffs Just aft of the main tray. Took some balsa sticks and strategically orientated them in an effort to get them close to 90 degrees from each other. Painted them black and then epoxied the wood blocks in place and CA’d the sticks. Used hot glue to install the antennas to the sticks.
Using mode A and C for the receivers as I’m not using SBUS.
Funny the two receivers I have - one was made in Taiwan and the other is made in China. The China one was a little bit smaller (less than 1mm) and was just a tiny bit loose in the 3DP holder I made... nothing a little dab of hot glue couldn’t fix.
1BE9A26C-E9EB-4A92-B6FE-024C8C349FD2.jpeg 5C40CEA7-CD74-4BDC-A8A6-B1D98F187914.jpeg 97EB49FB-ADC9-4EFF-81BB-D1BC8AC02E69.jpeg 30E7FC3F-0269-4527-A3B4-7E6CE7EDCB41.jpeg 658E01DA-E504-4720-B2BD-946DBA4C3811.jpeg 7A44BB9D-BBEF-4336-A5D6-92E10442309A.jpeg
 

AKNick

640cc Uber Pimp
Setting up the rudder servo.
With the power off, I center the rudder with tape, center the servo arm exactly 90 degrees, and make my push rod to the correct length. Once that is done I’m ready for the next step.

remove the arm, power up the servo, make sure it’s going the right direction.
Put my servo arm on, use sub trim to get the servo to exactly 90 degrees.now everything should fall in place perfectly. Use the turnbuckle to fine tune the rudder to center. Don’t forget blue locktite on the servo pinch bolt and center bolt.

DD84B55A-62BB-406E-8ED0-9A22392D534A.jpeg 9C38E62A-8F03-4921-9D89-3773A01CA141.jpeg BDE5743E-CFAC-41A3-AD37-723B9258391D.jpeg E745FC8C-8C6F-4347-B989-83376C871845.jpeg
 

AKNick

640cc Uber Pimp
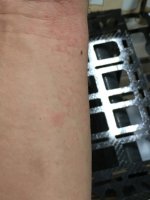
Here’s a little PSA about glass laminate structure and assembling your model. Most of theses routed pieces are clean cut, but some of them still have residual fibers clinging to the edges. My arm got a bunch of sticks from tiny glass fiber ends and irritated my skin. It’s good practice to wipe down the structure and blow it out with air or vacuum it real quick. Not the end of the world, but keep this in mind.
C0742AF0-22E6-49B2-949A-8C4566076B35.jpeg
 
Top