You are using an out of date browser. It may not display this or other websites correctly.
You should upgrade or use an alternative browser.
You should upgrade or use an alternative browser.
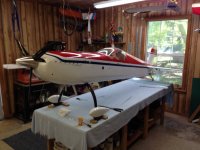
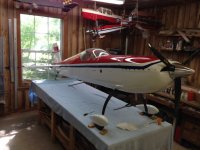
IMAC Dalton 300 ml build thread.
- Thread starter orthobird
- Start date
Hello all!! This bird now has over 80 flights on her, and she is flying super nice!
I love this airplane, and probably (no, correction, it is ) the best flying airplane i have ever owned.
I must admit, if you look thru the thread, I did not pay much care or attention to the tail wheel steering mechanism, and this was probably due to the fact, that I was so close to being finished, I cut corners.
This is a J & J tailwheel, and what I have had to do, is to remove the prior steering arm, which was screwed into the balsa at the bottom of the rudder. HA HA, i should have known better this would not last long. Believe it or not, it has lasted for over 80 flights, but i have noticed it was starting to come loose, slightly. Amazing how screws can get purchase in foam!!
Ok, this is not a solid construct.
The pictures now show, i have removed the G10 material arms, and now I have cut out a rhomboid shaped area on the front end of the bottom section of the rudder, approximately 1/4" thick, and then obtained a 1/4" plywood block, drilled three holes thru them, and then used blind nuts on the back side.
This is now glued in. Tomorrow, should be cured. I will remove the arm and three screws, then cover the area with black Monokote.
Here is my question, and before I get to that, i am using these mock cables, to let me see the travel. These wires you see will not be the ones I will use.
My question:
Should I go with a holes closer in on the arms?
and, anyone have any advice on what i can use between the compression spring and the hole of the steering arm. I do not like the idea of silicon tubing with zip ties.
If possible, please post pictures of your J&J tailwheel and how it is set up.
Thank you
When I was at my first Sportsman Level IMAC contest, this past weekend, on the day before the event, I was practicing, and came in for a landing, and the run way at the club deceived me, and I had a minor accident. There was a large pond of water behind the undulation in the surface of the grass run-way. From where I was standing, it could not be seen. As soon as i landed, the front end of the airplane started to nose over, and then it stopped with all wheels on the ground,
Well, the next day, at the competition, after the 1st flight, as soon as i landed, which was a normal landing, there was a large "POP" sound.
Then this is what was found:


the reason I am posting this, is, during my build thread, I did use a small angle, very thin, thinner than 1/16th". And it was not very long either way. At the same time, the Graph Tec landing gear did not fracture, but it did cause this damage. Which is not bad.
But makes me wonder if I should have done it differently.
Well, the next day, at the competition, after the 1st flight, as soon as i landed, which was a normal landing, there was a large "POP" sound.
Then this is what was found:
the reason I am posting this, is, during my build thread, I did use a small angle, very thin, thinner than 1/16th". And it was not very long either way. At the same time, the Graph Tec landing gear did not fracture, but it did cause this damage. Which is not bad.
But makes me wonder if I should have done it differently.
Dirt Doctor
50cc
Capt.Roll
70cc twin V2
Cam, here is how I did my Dalton. I couldn't figure out how to get the tension/length balanced between the two sides using wire and small chain links....LOL. Probably a lot more simple than I was trying to make it.
The pull/pull brass with ball links seems to be working pretty good.

The pull/pull brass with ball links seems to be working pretty good.


