• If you are new to GiantScaleNews.com, please register, introduce yourself, and make yourself at home.

    We're 1st in Giant Scale RC because we've got the best membership on the internet! Take a look around and don't forget to register to get all of the benefits of GSN membership!

    Welcome!

Scale Wendell Hostetler 30% PA-28 Cherokee Build

TonyHallo

150cc
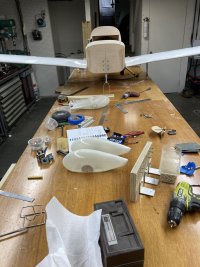
No problem, it was time for some mill work anyway. Working on the main gear struts. The struts are angled outward 3 degrees off the vertical and I wanted the wheel pants to look right. While studying the Robart site I came across these struts for a GP Chipmunk, I thought the mounting flanges would be the way to mount the pants on the Cherokee. Milled a piece of 1/2" aluminum scrap on a 3 degree angle to setup the Oleo ram on the correct angle and then milled the angle on the ram. I plan to use a 1/4" fender washer as the flange.
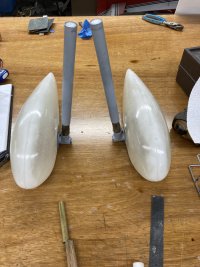
Had to remove pesky little tubes welded to the strut tube as well. Never did determine what they are used for.

IMG_1992.jpg
IMG_1991.jpg
GPCHIPMUNK-1_medium.jpg
 

TonyHallo

150cc
Work continues on the gear. Decided to make the gear 1" higher than show on the plan. The plan show a G38 for power that would swing an 18" prop, I plan to use a 25" x 10" on the 85FS. With the 1" added will have 3" of clearance. Took some measurements and determined the strut tubes needed shorten 5/8", the instruction state to cut the tube with a tubing cutter and do not deburr the inside, the white plastic puck is riven in and retained by rolled tube. The tubes come with plate welded on the end and the 2 1/2" wood dowel spacer. I left the spacer out for now and determine what is needed once the plane is finished. The flanges on the Oleo ram worked out great. Epoxied 1/8" plywood pucks inside the pants and the bolted on with blind nuts.


IMG_1993.jpg
IMG_1994.jpg
 

TonyHallo

150cc
When the wheels were installed there was noticeable camber in the wheel, I was hoping that the wheel pant would hide but no such luck. Had to set the ram back up in the mill and bore the axle hole perpendicular to the mounting flange. Bored to 3/8" and sleeve the hole back to 1/4". I have the nose wheel pant all fit and ready for paint.
Found a scrap piece of aluminum that was just about the right size for the headlight bezel so took a short brake from the landing gear work. It will look good when it is painted whit with the cowl.

IMG_1998.jpg
IMG_1999.jpg
 

TonyHallo

150cc
Time to move onto the engine. Milled these spacers on 2 degree angle, drilled and put the radius on the end in the mill. Tomorrow will stand the plane on the tail and center the engine in the cowl and finish mounting. Plan to baffle the cylinders to the firewall and make a chamber behind the engine low pressure with a lip on the bottom on the cowl. Well that's the plan anyway. The carburetor will be accessible through the inside of the fuselage.
Just might be finish sanding the end of the week. Getting warmer, time to get back to work on the windshield plug as well. I would like to paint the glass parts in April and have this bird ready for May.

IMG_2006.jpg
 
Top