Thanks for the link @anaign - from the looks of it, this product is similar to a product here I'm looking into HTPLA from Proto-Pasta in the USA, it requires annealing to crystallize the plastic to create a more heat resilient product. Anything using a higher temp filament will require substantial upgrades to the printer.
Sorry I haven't posted the baffles yet, kinda resisting posting it for free for everyone. I have yet to receive a "tip" from any upload I've ever created which makes me wonder why I do it other than just being a nice guy.
Hi Nick,
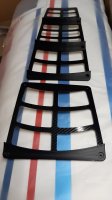
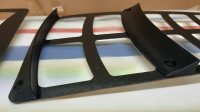
I understand you, sorry I just made a Thingivers account and sent you a PayPal donation for the Air Dams 89 SkyWing Laser Tunnel. Thank you for this fit perfectly, see picture in the attachment.
If you send the "baffles" to me exclusively aigner.a@a1.net I will send another PayPal donation.
regards
Andreas